
Act 4
Chapter: Hope and Run
COG Tags of Sergeant Major Hank Rustin
These are automatically acquired at the beginning of the chapter.
Hard Case #75
At the very start of the chapter, go down the stairs on the left and this case will be straight ahead of you.

Message from The Coalition
From the previous collectible, turn right and head for the memorial nearby. This is on the memorial.

COG Tags of Sergeant Betsy Barnes
Proceed down the long bridge and keep going until you see a big burned out vehicle laying on its side next to an Art Gallery on the left. The tags are on the ground in front of that burned out vehicle.


Hard Case #76
This is on the right side of the Sanctuary Cathedral about halfway through.


Hard Case #77
This is on the far right side of the Burial Grounds after exiting Sanctuary Cathedral.

Hard Case #78
Exit the Burial Grounds and go left all the way down the road until the very end. This case is on the sidewalk on the right at the very end next to a locked gate.


Hard Case #79
Go up the road that runs behind the Regalia Hotel. At the end, there will be a blown open doorway on your right that you can enter. The case will be in the room you enter.


Hard Case #80
This is near the main front entrance to the Regalia Hotel inside. If you enter from the front, it will be to your left next to the stairs.


Regalia Hotel VIP Guest List
This is on the front desk in the same room as the previous Hard Case. It is on the right side of the room.

Hard Case #81
Exit the hotel through the front entrance. Go to the right and then head left on the street with the train tracks down the middle. Go up the stairs on the right and into a side area. This case is in that side area at the top of the stairs.


dISPUTE Magazine
Back in the hotel, from the main entrance, look to your right to see a staircase that leads to a big hole in the wall. Go up those stairs and through the hole in the wall. Drop down to the street and then go left to a dead end at a tunnel. This is on the ground to the right of the truck.


Hard Case #82
Follow the objective marker through the hotel now and it will take you out through the back. You’ll drop down into an area with a fountain. The case is behind that fountain.

Hard Case #83
When you come to the wide open area with enemies almost immediately after the previous Hard Case, there will be a red restaurant on your right. Go into that restaurant and then head into the side room on the right to find this case.


Anniversary Card and Tickets to Khindago
Across from the restaurant, there is a building nearby where a mounted machine gun is. There were also some enemies in there during the fight. This collectible is in that building on the counter behind the cash register. You can get into this building by climbing up from a short staircase and into a hole in the wall to the right of the mounted gun.


Hard Case #84
From the building you are in from the previous collectible, go through to the back and you should see a rope that you can descend. From that rope, look straight across the street to see this case in front of a closed door.


A Handwritten Letter, in Vasgari
Follow the objective marker to the Cooper Commons. Before heading north, go to the south corner right near where the map says, “Chairman Monroe Monument.” This collectible is on the back of a painting laying on the ground near the southern most wall of Cooper Commons.


COG Tags of Specialist Harrison Alexieff
These are on the far left side of the Cooper Commons. There are two sets of stairs that go up a level on either side of a subway entrance. Go up the stairs to find this collectible in front of a dead Gear sitting against a tree display.


Statuette of Roman Kalona
Just before leaving the Cooper Commons, there is a red Souvenir Shop right before reaching Kalona Square. Go into that shop and head over to the left wall to find this on a shelf next to some t-shirts.


Hard Case #85
When exiting the souvenir shop and entering Kalona Square, go left toward the three smaller archways. Go through those archways and straight back. At the end, go left and then head to the right corner of this area to find the case.


COG Tags of Specialist Dale Maddoc
Head over to the west side of Kalona Square. Head to where the “K” is on your map where it says Kalona Square. Just slightly left of that K is an open courtyard toward the University where there are a lot of dead bodies. On the right side of that courtyard near the entrance, you should see a big streak of blood going vertically down a destroyed platform. This collectible is on the ground at the base of that blood streak.


Hard Case #86
This is to the left of the gates you need to exit to follow the objective. Before leaving, go left of the gates behind the police car to find this.


Blood Splattered Ulk Plushie
Shortly after exiting through the previously mentioned gates, head up the street and then go right when you come to the first police car. This is on the ground behind the blue car to your right.


Hard Case #87
Follow the objective marker to the end of the street where you’ll have to fight a few waves of enemies. When you enter this area, go past the subway entrance on your left. Once your past it, go left to find this case up against a wall near some barbed wire.


COG Tags of Specialist Mei Aoi
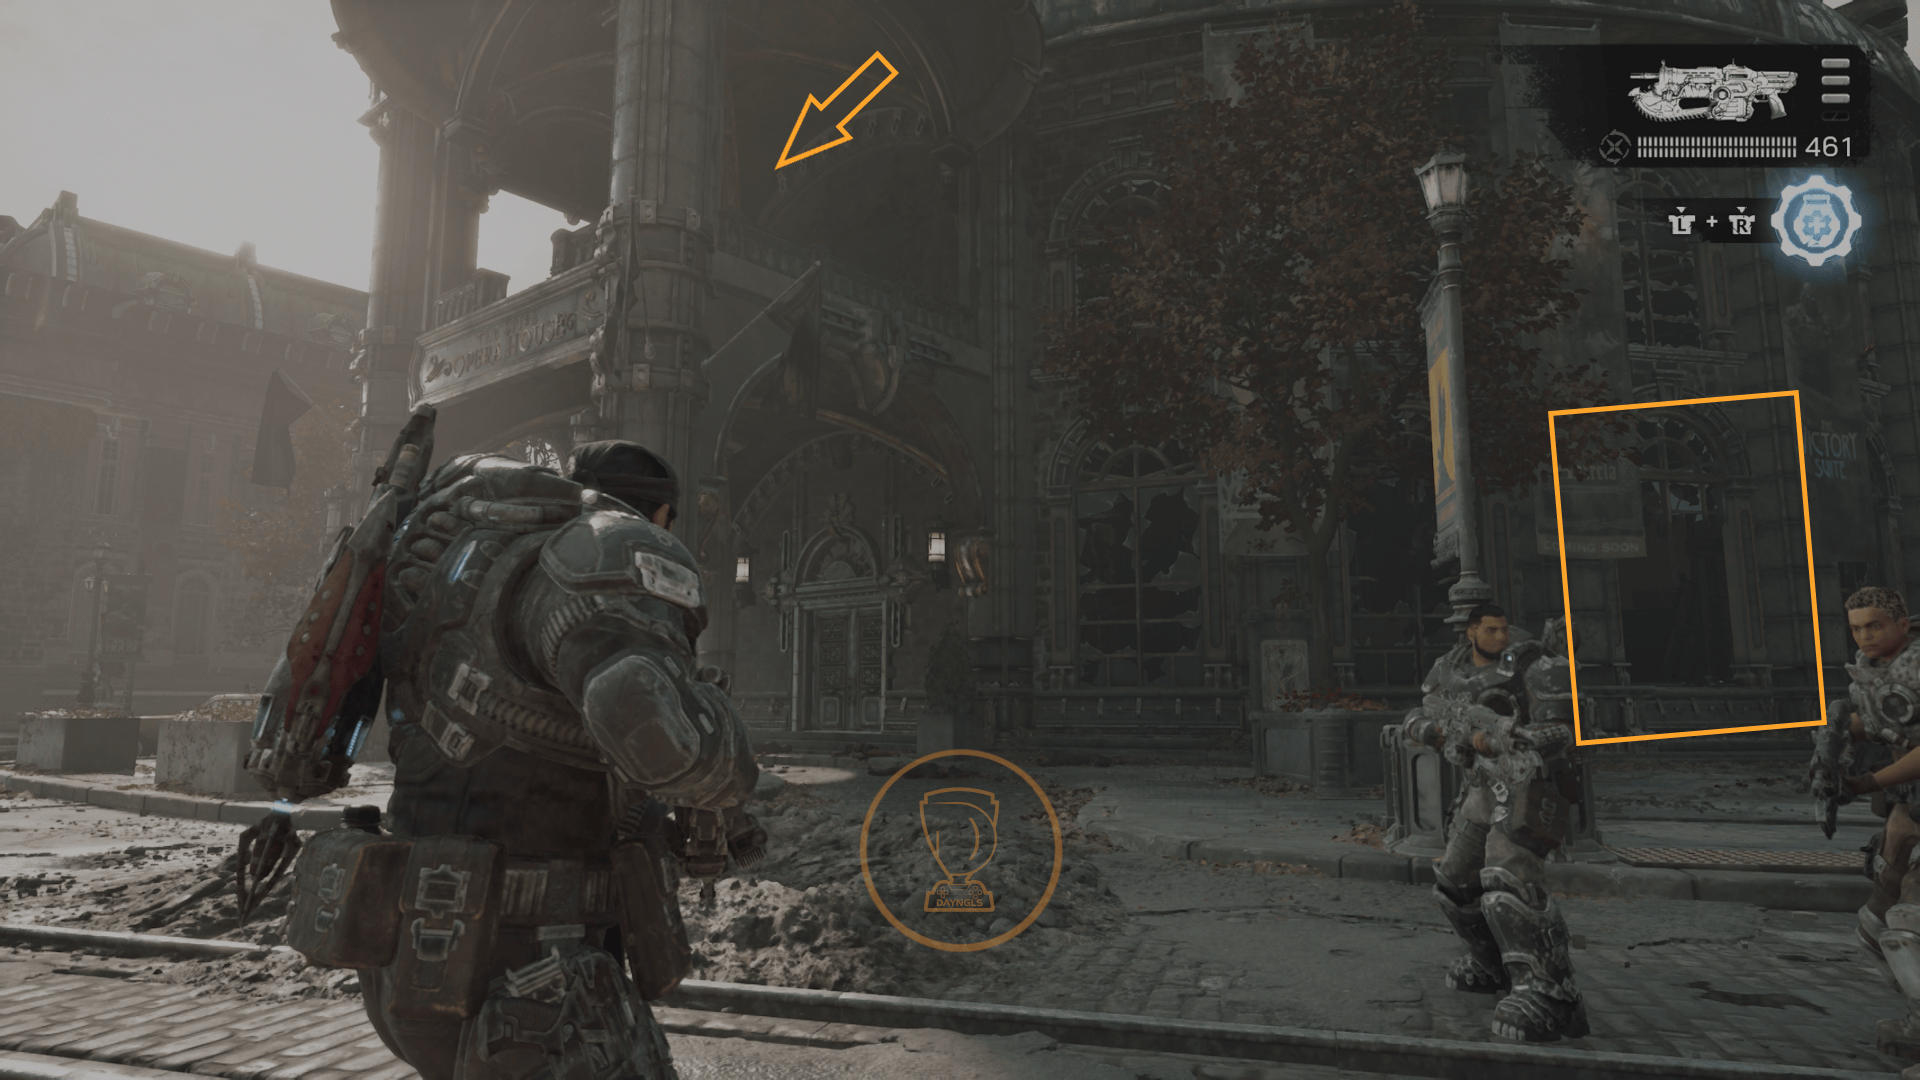
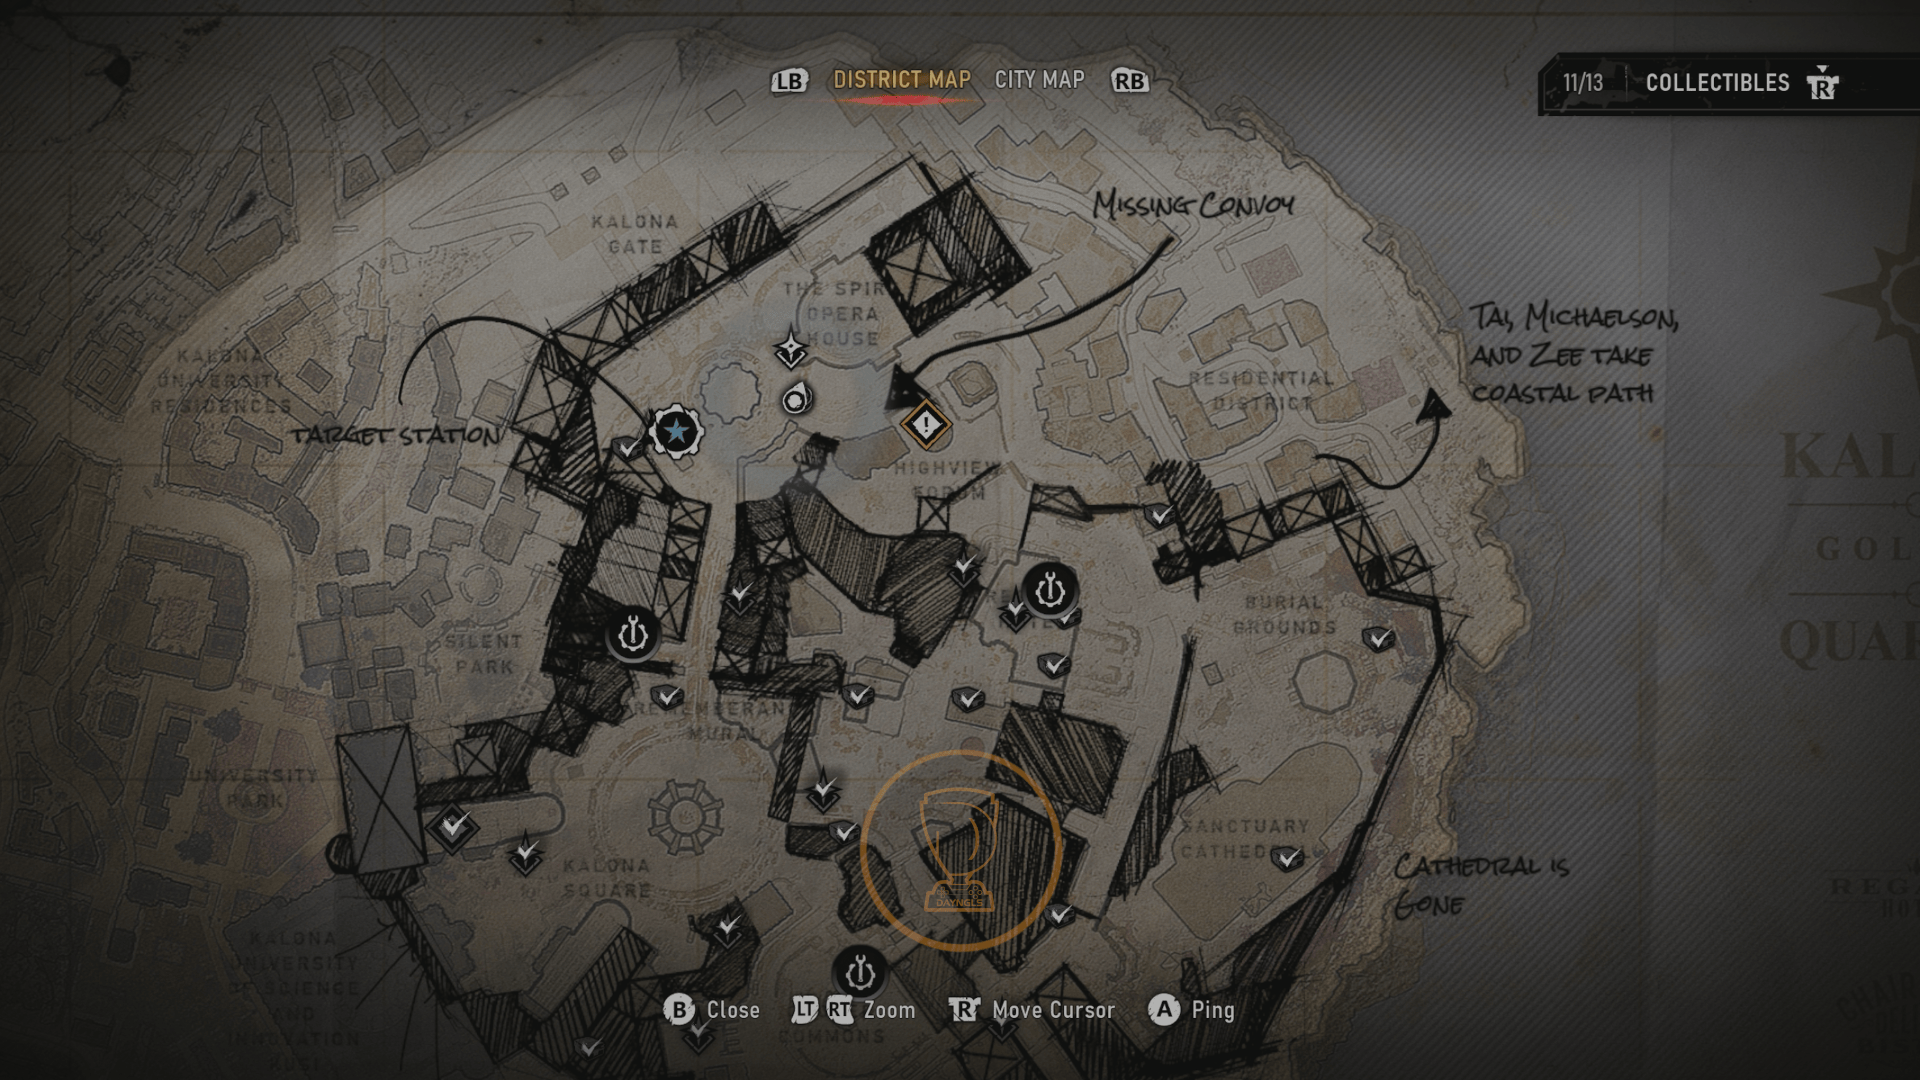
Go to the Opera House. Run straight down the road that runs along the left side of the Opera House. At the very end of the road, you can find this collectible on the ground next to an ambulance.


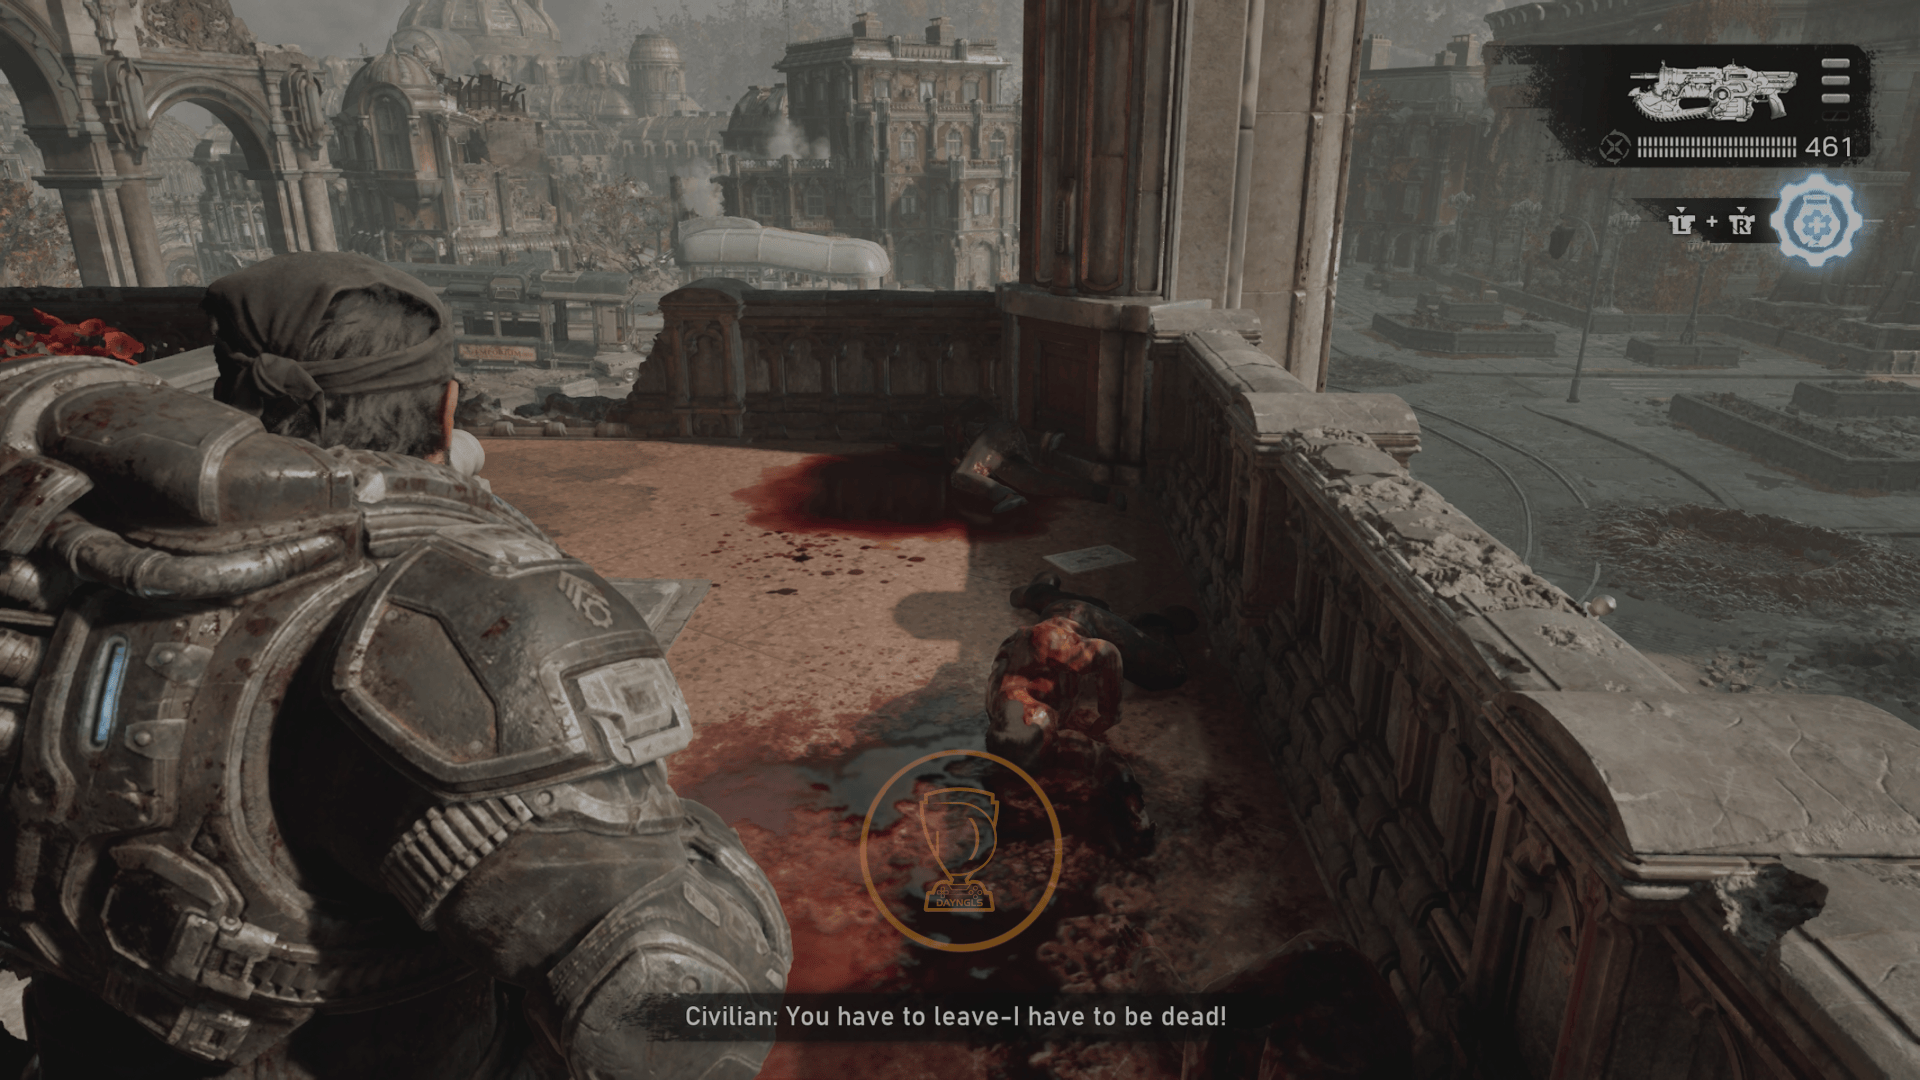
Lighter Darker Opera Program
Go to the Opera House. Climb through a window on the right side of the Opera House to enter. Go up the stairs on the left side of the building and then head for the balcony that overlooks the area you just fought in. This is on the ground on that balcony.
Hard Case #88
Go over to the clocktower. This will be marked on your map as the secondary objective, Clocktower Defense. When facing the clocktower, follow the road that wraps around the left side of it. If you did the secondary objective, it’ll be where most of the enemies were spawning. When you reach a train car that says, “74, Downtown” across the front, go left. There is a small staircase that leads to a little area left of that train car. The case is in that area.


Chapter: Technical Difficulties
Hard Case #89
This will be on your path shortly after beginning the chapter. It’ll be on your left after the narrow hallway.
COG Tags of Sergeant Aman Landry
Get on the train and ride it to the first stop. When the train stops at the next station with enemies, you need to get off the train and pick up this collectible before the train leaves. The collectible is in the front of the area in the middle next to a bench. It also says, “Clement” on the wall above the bench. So get off, grab this and get back on the train quickly.
N0 80 Graffitied Poster
When the train stops at the second station, get off and head over to the westbound side tracks. Turn left at the tracks to find this hanging on the wall next to a bench.
Hard Case #90
Go through the exit of the train station from the previous collectible. Follow the narrow hallway and you’ll come to a corner. The exit is left and there is a side room straight ahead. Go into the side room to find this case. You should be able to see it glowing as you come down the hallway.
Hard Case #91
Exit the subway and kill the enemies on the street. Go up the stairs to the monorail station. At the top of the stairs, look back to your right to see this case on the platform on the other side of a gap.
Chapter: Tough As Nails
Hard Case #92
After speaking with Auntie, go through the big gates. On the other side of the gates is a waist high brick wall on your right. Hop over that wall to find this case.
Young Artists Night Poster
From the previous case, turn around and head down the street the opposite way of the Hard Case toward the Power Grid Station. This is hanging on the wall on the left side of the street.
Hard Case #93
This is found in the Seradyne Manufacturing building in the center of the area (not where it’s labeled on the map). Go into the entrance on the right and for the back right corner. Climb up the debris to reach the second floor. This is on the second floor toward the balcony.
Hard Case #94
From the previous case, turn around and toward the big hole in the wall on the second floor of the Seradyne Manufacturing building. Jump through the hole and then look right to see this case out on a platform. If you fall down when jumping through the hole, you can climb back up using the boxes below.
Maranday Apple Brandy Bottle
From the previous case, drop down to the ground and follow the alley way around and up a short staircase. After the staircase, you should see a rope hanging from a walkway up to your right. Ascend up the rope. At the top, go left and then take the first right out onto the roof. This collectible will be on a small red toolbox to the left.
COG Tags of Corporal Goran Ducaine
From the previous collectible, turn around and backtrack to the rope you used to ascend up here. Go past the rope and into the next building. In the building, turn right and jump over the gap in the path. This will be at the end of the walkway after jumping the gap.
Hard Case #95
From the previous collectible, drop down to the ground level of the building you’re in. Go to the back right corner of this garage where you can find a door you can interact with. Open it, kill the enemies and then enter the room to find this case.
Hard Case #96
Return to the Seradyne Manufacturing building from earlier where we collected a few things already. Get back up on the second floor. You were there earlier. On the second floor, use the stairs to reach the roof. Once you reach the roof look left and head straight and climb up the platform. This case will be to the left of the double doors on this platform.
COG Tags of Lance Corporal Calder Hunt
From the previous case, turn around and head back to the roof where you came up the stairs. There is a big smoke stack on the corner of the roof of the building you’re on. The collectible is at the base of that smoke stack.
A Letter Regarding Armadillos
From the previous collectible, get down off of the roof and get back to the ground outside of the building. Turn around and look to the northwest corner of the map. You should see a sign that says, “Prospect Bay.” There are NPCs firing weapons from the balcony over there. Go to that building and enter on the ground floor to find this collectible on a desk in the back side of the floor.
R.I.G Component
From the previous collectible, exit this building and head to the west side of the map that is labeled, “Freight Yard,” on the map. This is in the train car next to the R.I.G machine in the train car.
Hard Case #97
From the previous collectible, exit the train car from the right. Stay along the right side and there will eventually be an opening and a path that heads further right. Go down it and look behind the green dumpster to find this case.
Imulsion Blast Charge
This is found in the shipping container that you have to interact with at the end of the Special Cargo secondary objective. This objective is near the the previous Hard Case. As you head a bit south from the case, you’ll come to the NPCs that will give you the quest.
Refiner’s Union Jacket
This is found near where you are given the Special Cargo secondary objective. Go down the stairs from where you started that objective. Go up the stairs that are ahead and slightly left. Follow them up and into the building. This will be on the right of the building as you enter.
Hard Case #98
This is found on the helipad just behind the shipping container where the Imulsion Blast Charge was found.
COG Tags of Lieutenant Jacob Palma
From the previous case, turn and face toward the shipping containers labeled SFG. Head that way until you come to some rail tracks with big rail cars sitting around. Then, face the building where the secondary objective, Fire in the Hole, is. Go into that same building on the ground floor. Enter via the big rail car sitting inside. Go through that car and drop out the other side. Look to your right to see this collectible.
Hard Case #99
There is another case in the same location as the previous collectible. But it is locked in a train car. In order to open it, you will need to complete the secondary objective, Trapped Locust. During that secondary object, you’ll interact with a console to move the train car. After that, you press a button to open it. Kill the enemies that come out and then go in the car and open the case.
Hard Case #100
From the previous case, leave the building and head for the center of the map. Look for the two big red pipes that run up the side of a building. Go toward those red pipes. Just past those big red pipes on the right is a rope you can ascend. Go up the rope to find this case.
Seradyne Factory Closure Sign
From the previous case, head into the building via the hole in the wall with the pile of bricks to left. Once you go through that hole, look to your right and go down the ladder. At the bottom of the ladder, go left and then right. The sign will be on the wall straight ahead by the stairs.
Hard Case #101
From the previous collectible, turn to your right and go straight across to the opposite side of the factory. Look for a ladder on your left. Climb up that ladder and the case will be in front of you.
Blurry Photo of Locust Attack
From the previous case, turn around and run to the other side of the walkway that was behind you. At the end, hop over the ledge and you’ll drop onto a staircase. Take those stairs up and out of the building. Follow this path to the left and you’ll eventually come to an open door on your right. Go in that door to find this on the ground in the small room.
Severed JACK Bot Head
From the previous collectible, drop down to the ground where the enemies were. Look over to your right to see blown open doors leading into the building. Go through the doors and straight back to find this on the ground at the end of the path.
Hard Case #102
From the previous collectible, exit the building the same way you entered. Go into the main story objective building. Head up the ramp on the right side to find this case.
COG Tags of Lance Corporal Dalia Avdol
From the previous case, turn around and go to the opposite side of the room. Climb up the debris to reach the right corner where these tags are laying.
Hard Case #103
Interact with the truck for the main objective and then follow the objective marker to it. This case will be on the ground next to the truck when you reach the marker.
Port of Kalona Docking Registry
This is up in the tower that you have to go to as part of the story. It is on the four sided blue control panel left from where you come up the stairs.
Chapter: Signals
Hard Case #104
This is found inside of a white van that is parked to the right of the fuel station at the beginning of the chapter.
Infinity Mints
These are found inside of the fuel station behind the counter with the cash register.
Hard Case #105
This is on the roof of the fuel station. Climb the dumpsters behind it to reach the roof.
Hard Case #106
Progress through the chapter until you come to the next fight against the Locust at a power station. This case is on the left near the small building at the power station.
Signed Kalona Eagles Cap
Continue through the chapter until you come to a bridge. Don’t cross the bridge yet. Instead, go down underneath it to find this hat directly below the bridge.
Hard Case #107
When you reach the radio tower, there will be a cutscene. After it’s over, look to your immediate left to see this case in front of a wall.
Hard Case #108
From the previous case, look right and head straight. Take the first left. Then, take the next right to find this case near a target practice area.
Pair of Binoculars
From the entrance to the radio tower room, go to the right to the tower with giant ball on top. This collectible is laying on the walkway next to that tower.
Photo of Lucas and his Friends
Enter the radio tower building and go to your left to find this photo hanging on a corkboard.
Lucas’ Handheld Radio
This is on the desk directly across from the previous collectible in the same room.
Chapter: Paths Diverge
COG Tags of Lance Corporal Aniyah Musa
As soon as you get control at the start of the chapter, turn the camera to look behind you. This collectible is found in the corner by the gate behind a tree stump.
Hard Case #109
Enter the first building shortly after the previous collectible and you’ll have to fight off waves of enemies. From where you entered the building, go straight back and to the right corner to find a small room where an NPC was taking cover during the fight. The case is in that small room.
Hard Case #110
Shortly after leaving the previous area, you’ll come to another combat encounter. You’ll have to fight a reaver here. When you enter the area from the street, turn left. There will be an Amberstone box truck. Turn left there and look for this case behind a van parked in the corner.
COG Tags of Lance Corporal Ava Wilson
After taking out the jammer, you’ll move into the next area. As soon as you enter the next combat encounter, look to your right to see a ladder. Climb up that ladder. At the top, go right up the stairs and then left straight back to a dead end on the walkway. This collectible is at the end.
Hard Case #111
Make your way toward the objective marker for the Timgad Refinery. You’ll fight your way through a building. Just before exiting this building, look left to find this case next to an L shaped desk.
Hard Case #112
This will be on the left just before exiting the area where you fight the Brumak.
Chapter: Critical Failure
Hard Case #113
This will be to the left of the desk in the Timgad building. This one is hard to miss.
Bust of Allfather Decha Timgad
This is found to the right of the previous case. It is behind the desk.
Hard Case #114
After riding the elevator, exit it and go right. Look right again to see a ladder. Climb up the ladder and the chest will be on the roof of the elevator building you were just in.
Damaged Gas Mask
From where you got off on the elevator, go left and then right to the end of the walkway to find this on the ground. Grab it before climbing down.
Hard Case #115
Make your way back up another ladder and then kill the enemies you encounter. The objective marker will be to, “enter the main building.” Before going through the doorway, go over to the left platform from the objective door. This case is on that platform.
Hard Case #116
When your squad splits up, you will interact with console while with Reyes. After interacting with that, you’ll go down a hallway and enter a combat section. There will be a heavy enemy straight ahead of you. The case will be to your immediate right when you first enter that combat section.
Hard Case #117
From the previous collectible, head across the walkway to the opposite side. There is a room on the opposite side. Go into that room and this will be to the left of the hole in the room.
Tyran Business Monthly
From the previous collectible, you can leave this room and go down the stairs. Enter the door on the left and the magazine will be on the ground on the left side. You can also drop down through the hole from the floor above and you’ll land in the room with the collectible.
Memorandum to Dr. Elliot
This is found on the shelf behind the desk in the Amber Labs office you will enter as part of the story.
Hard Case #118
After leaving the previous collectible room, you’ll head down a hallway. When the hallway turns left, there will be a room straight ahead. Go into the room before turning left to find this case.
Dalia Fabbri’s Research Journal
Follow the hallway and you’ll enter another room as part of the story. There will be a diagram of a missile on the right wall. This collectible will be on a table to the left of the exit door.
Hard Case #119
This is in the same room as the previous collectible. It is to the right of the exit door.
Hard Case #120
This will be found on the right side of the very next room after the previous collectible room.
1 thought on “Gears of War: E-Day Collectible & Hard Case Guide”