


Welcome to the main story walkthrough for Pokémon Legends: Arceus! The latest Pokémon game has hit the Nintendo Switch and it’s not quite what you’re used to in the mainline Pokémon games.
Arceus shakes up the formula a bit by reworking how you progress through the game. Arceus is more mission structured than in previous games. Instead of travelling from one city to another taking down gym leaders, you’re going to be helping out a village with some issues they’re having with Pokémon in the new region of Hisui.
The village is going to act as your base of operations. Everything you do will start here. You’ll even have your own house here. There will be an organization that you will be helping through out the game based in this village. They’ll be the ones sending you out on missions. When we talk about missions, that means there are story and side missions to complete. Side missions in Arceus are called Requests. You can talk to NPCs across the various areas to get these Requests. These are usually pretty small tasks that need to completed. They are not big expanding side stories or anything you may be used to from other RPGs.
There are a lot of these Requests to complete and none of them are missable, time sensitive or anything stressful like that. You can complete them at your leisure.
The travel has been cut down here as well. In Arceus, you will not be travelling the many routes that usually make up a map in a Pokémon game. Instead, you’ll be fast travelling to several big open areas where you can complete missions and complete your Pokédex.
Speaking of your Pokédex, completing this will be different in Arceus as well. Yes, you’re going to need to find and catch Pokémon in order to fill it, but there is new difference here.
Each Pokémon page in your Pokédex will have several research tasks. You’re going to need to complete all of these research tasks in order to fully complete your Pokédex. These can range from a lot of different things, but you’ll need to catch several of each species, battle several of each species, use certain attacks and see certain attacks used on specific Pokémon types etc.
Arceus also adds some dialogue options. Now, this isn’t Mass Effect or something along those lines, but they are present here.
You don’t have to worry about splitting paths or missing story content when it comes to the dialogue options. There are no right or wrong choices. Every choice will lead you to the same result.
Page 1
- In An Unfamiliar Land
- The Galaxy Team’s Entry Trial
- The Basics of Crafting
- Getting to Work on Research Tasks
- A Request From Mai
- Summoned by Commander Kamado
- The Frenzy of the Lord of the Woods
- Arezu’s Perdicament
- A New Mission
- The Lordless Island
- Scaling Perilous Heights
- The Slumbering Lord of the Tundra
- Disaster Looming
- The Trial of Lake Verity
- The Trial of Lake Acuity
- The Trial of Lake Valor
- Atop Mount Coronent
- The Counterpart
- A New Day Dawns
- The Researcher of Myths
- The Plate of Prelude Beach
- The Plates of the Lakes
- The Plate of Firespit Island
- The Plate of Moonview Island
- The Plate of Snowpoint Temple
- Seeking The Remaining Plates
In An Unfamiliar Land
Arceus Intro
When you first boot up the game, you’ll be picking your appearance and choosing your name. There are more appearance customization options later in the game, but you’re just choosing a general template for now.

After making your decisions, you’ll wake up on the aptly named Prelude Beach and Professor Laventon will be speaking to you with three Pokémon.
Answer his questions and then the Pokémon with him will run away. Laventon will chase after them after asking you to help him track them down. You’ll now have full control to run after the Pokémon and the professor.
Soon after leaving the beach, you’ll come across and pickup the Arc Phone after interacting with it.

Catch up to Laventon and you’ll go through the tutorial on how to catch Pokémon. You’ll now be tasked with catch the three Pokémon for Laventon.
Catch all three and follow Laventon to Jubilife Village.

Follow Laventon down the main road of Jubilife Village. He will ask you to meet him at the village canteen called The Wallflower. Follow the marker to the Wallflower where you’ll initially be denied entry.
Here, you’ll be introduced to Rei or Akari and Cyllene.

You’ll be treated to another cutscene where you have a meal with Akari/Rei and Laventon. You’ll be given a little more background on what Professor Laventon is up to working with Pokémon.
After the cutscene ends, it’ll be night time. The objective marker will point you toward your quarters. You can interact with the items in your room right now, but there’s not a whole lot we can do here at the moment.
So go to sleep to end the day and complete the first mission of the game.
The Galaxy Team’s Entry Trial
I Choo-Choo Choose You
When you wake up the next day, Akari/Rei will be at your door. It’s time to take part in the Galaxy Entry Trial. Follow the objective marker to meet up with Cyllene at the Galaxy Team HQ.
Cyllene will speak to you and give you your first task. You’ll need to go to Obsidian Fieldlands and capture a Bidoof, Starly, and a Shinx. Cyllene will also give you a Survey Corps Satchel.

Before heading out though, it’s time to make a choice.
Professor Laventon will show up and offer you the chance to pick your starting Pokémon. The choices will be between the three Pokémon you captured on Prelude Beach. You will choose between Cyndaquill, Rowlet, and Oshawott.
After you make your choice, Laventon will also give you 20 Poké Balls.

Obsidian Fieldlands
You are now free to head over to Obsidian Fieldlands. Follow the objective marker and make your way out of town.
When you reach the gate, you’ll be introduced to Volo. He’ll challenge you to your first battle here in the Hisui region.

- Volo
- Togepi Lv. 5
Make quick work of Volo and he’ll give you five Potions.
You’re also free to leave to the Obsidian Fieldlands now that the battle is over. Speak with the guard at the gate and choose your destination on the map.
This first trial is very simple and acts as a tutorial on encountering wild Pokémon. Follow the objective marker and your first encounter will be against Bidoof. All you have to do here is throw a Poké Ball at it and you’ll catch it no problem.
Your second encounter will be against Starly. For this one, you’ll need to crouch and slowly move toward it hidden through the tall grass. When you get close, hit it with a Poké Ball to catch it.
Your last encounter will be against Shinx and this one will introduce you to your first battle against a wild Pokémon in the Hisui region. Send out your Pokémon and weaken the Shinx. Throw a Poké Ball at it during the battle to capture it.
When you’re all done catching those, you’ll be back at the camp speaking to Professor Laventon and Akari/Rei.

Time for a Change
After the short cutscene in Obsidian Fieldlands, you’ll be returned to Jubilife Village. Follow the objective marker back to the Galaxy Team HQ.
Enter the HQ and speak to Cyllene in her office.

She’ll congratulate you and allow you to keep the Survey Corps Satchel. She will also give you a Survey Corps Uniform and a pair of Survey Corps Sandals.
Return to the room you slept in and change your clothes to the Survey Corps gear you just received. You can change clothes by interacting with the mirror in your room.

After changing, you’ll be automatically transported back to the Galaxy Team HQ where you will be speaking to Akari/Rei. Cyllene will also speak with you. She will allow you to continue using the room you slept and changed in. That room is your base of operations for lack of a better term moving forward in the game.
After that, it’ll be time to meet with the commander of Galaxy Team. Head upstairs to the third floor to meet Commander Kamado in his office.
Speak with Kamado in a brief cutscene and the second mission of the game will be completed.

The Basics of Crafting
The third mission of the game will automatically begin. You’ll be in Cyllene’s office yet again.

Cyllene will explain the ranking system to you here.
You will begin with no rank at all. You can increase your rank by adding to your Pokédex. The more Pokémon you see and catch, the higher your rank will be.
After that explanation, Cyllene will then give you the recipe to craft Poké Balls and 3,000 dollars.
- Poké Ball Recipe
- 1 Apricorn
- 1 Tumblestone
After the conversation, you can now go to the Craftworks. Follow the objective marker to the location. When you exit the HQ, you’ll be approached by Anthe outside. She will give you an Everyday Kimono and a pair of Everyday Trousers. You can visit her to buy more clothes.
Head over to the craftworks to speak with Akari/Rei. They will provide you with the necessary materials to craft a Poké Ball.
Go to the workbench and select the Poké Ball to craft it. This screen will give you a breakdown of all the materials that are needed to craft an item as well as how much of the materials you have on you as well as in your storage. You’ll be able to craft 20 Poké Balls here.
Craft the Poké Balls.

And with that, the third mission is completed.
- In An Unfamiliar Land
- The Galaxy Team’s Entry Trial
- The Basics of Crafting
Page 2
- Getting to Work on Research Tasks
- A Request From Mai
- Summoned by Commander Kamado
- The Frenzy of the Lord of the Woods
- Arezu’s Perdicament
- A New Mission
- The Lordless Island
- Scaling Perilous Heights
- The Slumbering Lord of the Tundra
- Disaster Looming
- The Trial of Lake Verity
- The Trial of Lake Acuity
- The Trial of Lake Valor
- Atop Mount Coronent
- The Counterpart
- A New Day Dawns
- The Researcher of Myths
- The Plate of Prelude Beach
- The Plates of the Lakes
- The Plate of Firespit Island
- The Plate of Moonview Island
- The Plate of Snowpoint Temple
- Seeking The Remaining Plates
Getting to Work on Research Tasks
Side (Re)Quests
Immediately after crafting the Poké Balls, Laventon will appear and give you a Pokédex.

Just before leaving, you’ll be stopped by Beauregard. The guard outside of Galaxy Team HQ. He will have a request for you.
Requests act as side quests in Pokémon Legends: Arceus. The request he gives you is called “Wurmple Can Evolve.” If you catch a Wurmple, you can give it to Beauregard to complete this request. There will be a separate guide for Requests as we will be focusing on the main story missions here.

There are few more requests you can pick here in Jubilife Village as you make your way out to Fieldlands Camp.
You can check to see where the requests are by pressing – and checking your map. They will be listed as blue and white diamond icons on the map.
Fieldlands Camp
Leave Jubilife Village and head to Fieldlands Camp.
Once there, you’ll be speaking with Laventon and Akari/Rei. Laventon will explain Research Tasks to you. You will need to complete these tasks in order to complete your Pokédex.

If you thought the tutorials were over yet, not quite.
Run after Akari/Rei to continue to learn about the new mechanics of the Pokémon Legends: Arceus open world.
You’ll be walked through how to complete a research task using the Bidoof that we caught earlier.

To check research tasks for a specific Pokémon, target it out in the wild with ZL and then press Down on the D-Pad. You can practice these or complete a few here before moving on if you’d like.
When you’re ready to go, run after Akari/Rei again.
You’ll now be practicing more research tasks on wild Starly in the area. You can do more tasks, or catch up with Akari/Rei.
When you reach Akari/Rei for the third time, we’ll be instructed to complete a research task while battling against a Buizel. So find a Buizel and battle it. We want to see it use the Aqua Jet attack in battle. You can actually catch one use it yourself in battle. It does not have to be used by a wild Buizel.

You can do that now or later.
Meet with Akari/Rei for a fourth time and they will give you a Crafting Kit. This will allow you to craft items away from a workbench. In addition to that, you’ll also be given the recipe for Potions.
- Potion Recipe
- 1 Oran Berry
- 1 Medicinal Leek
Spend some time catching Pokémon and completing research tasks out here. When you’ve completed enough and are ready to move on, head back to the camp and speak with Laventon. You will need to gain at least one rank before you can progress further.

You’ll automatically be transported back to Jubilife Village. Head to Galaxy Team HQ and speak to Cyllene. She’ll give you the rank of First Star. With the rank of First Star, you’ll now be able to use Heavy Balls. Pokémon up to level 20 will obey you in battle as well.
She will also give you the recipes for Heavy Balls and Revives.
- Heavy Ball Recipe
- 1 Apricorn
- 1 Black Tumblestone
- Revive Recipe
- 1 Vivichoke
- 2 Medicinal Leeks
After that, the fourth mission will be completed.
A Request From Mai
The next missions begins with you having another meal with Laventon and Akari/Rei. They’ll give you a little more info on research tasks and requests from NPCs. They will eventually start discussing Mai with you as well.
On the next day, it’ll be time to meet Akari/Rei at the training grounds in Jubilife Village. If you have any Pokémon you’d like to switch out from your party, you can do that now.
You can also explore more of Jubilife Village and speak to the various vendors.
Training Grounds
When you’re ready, head over to the training grounds by following the objective marker.

When you reach the training grounds, Akari/Rei will explain they have a Pokémon of their own as well. This Pokémon is none other than a Pikachu, but there’s a problem. They are having an issue battling as a team. They will ask you for assistance in coming together as team. So, be ready to battle again Akari/Rei.
- Akari/Rei
- Pikachu Lv. 9
I know you’re feeling bad for them, but we must show no mercy. Defeat the Pikachu and beat Akari/Rei. There’s a lot to be learned from losing. Akari/Rei will figure it out.
After the battle, Akari/Rei will explain the different types of Pokémon and their attacks. You should always matchup against an opposing Pokémon’s weakness.
After learning about types, your conversation will be interrupted by Zisu.

Zisu is the Captain of the Security Corps. She will give you some advice and explain that you Pokémon can master their attacks. Pokémon moves can be performed in different styles. These are strong style and agile style.
When in a battle, you can highlight a move and press L or R to switch the style of a move.
You can speak to Zisu to teach your Pokémon some new moves, or you can head out to the objective and continue on with the story.
Mai Time
When you get to the Obsidian Fieldlands, you’ll immediately run into Volo.
He’ll teach you the Secret Back Strike Technique. This will allow you to hit a Pokémon in the back with a Poké Ball which will surprise it. This will increase your chances of catching the Pokémon.

Following the conversation with Volo, you can now head to the objective marker. Speak to the NPC on the bridge and he’ll let you pass.
On the other side of the bridge is Akari/Rei and Mai.

After the introduction, you’ll be forced into battle against Mai. All she has is her Munchlax, but it’s Rollout attack can be a bit of a pain.
- Mai
- Munchlax Lv. 10
After winning the battle, Mai will heal up your Pokémon and give you five Vivichokes.
Mai will ask you to follow her to Deertrack Heights to help with an issue there. You can catch Pokémon, pick up requests and complete research tasks on the objective marker if you’d like.
When you reach Mai, she will explain what Alpha Pokémon are. Alpha Pokémon are bigger and stronger versions of Pokémon that can also know attacks that are rare for their kind. They can be caught, but will be tougher to catch.

You will even battle against an alpha Kricketune here. You can catch it as well.
After the battle against the alpha, your conversation will be interrupted by the appearance of a Wyrdeer.
After the Wyrdeer leaves, Akari/Rei will approach and tell you its time to set up a base camp.

This will be the end of the mission.
Summoned by Commander Kamado
The screen will fade to black and the base camp will be set up at Deertrack Heights. This will be a new destination to select when leaving Jubilife Village.
You’ll now be automatically transported back to Jubilife Village where you will be having another meal with Laventon and Akari/Rei.
During the meal, you’ll hear about a Kleavor attack. You better believe we will be eventually investigating this Kleavor.
After the meal, you’ll sleep. Akari/Rei will wake you in the morning and tell you to hurry to Kamado’s office.
Leave your room and you’ll overhear an argument between Irida and Adaman. These are the leaders of the Pearl and Diamond clans.
When the argument ends, you can head inside to the HQ or you can pick up the two requests from around town.
There are also requests in Laventon’s office on the chalkboard inside of the HQ on the first floor. There is another request on the second floor.
Go to Kamado’s office on the third floor. Listen in on the conversation between Kamado, Irida and Adaman.

At the end of the meeting, you’ll have your next mission objective. You’re going to have to go study Kleavor.
- In An Unfamiliar Land
- The Galaxy Team’s Entry Trial
- The Basics of Crafting
- Getting to Work on Research Tasks
- A Request From Mai
- Summoned by Commander Kamado
Page 3
- The Frenzy of the Lord of the Woods
- Arezu’s Perdicament
- A New Mission
- The Lordless Island
- Scaling Perilous Heights
- The Slumbering Lord of the Tundra
- Disaster Looming
- The Trial of Lake Verity
- The Trial of Lake Acuity
- The Trial of Lake Valor
- Atop Mount Coronent
- The Counterpart
- A New Day Dawns
- The Researcher of Myths
- The Plate of Prelude Beach
- The Plates of the Lakes
- The Plate of Firespit Island
- The Plate of Moonview Island
- The Plate of Snowpoint Temple
- Seeking The Remaining Plates
The Frenzy of the Lord of the Woods
Begin the mission by going downstairs and speak to Laventon and Cyllene. They will brief you a little bit more on the situation surrounding Kleavor.
Mai and Adaman will also enter the room and give their thoughts on what you should do with Kleavor.
We will also be given our next location to visit. It’s time to make our way to Grandtree Arena in Heartwood.
When you go to leave, you’ll be stopped by Bagin. He will teach you how to carry more items in your satchel by paying 100 dollars. He will open up more space in the satchel if you speak to him again with the price increasing each time.

Head toward the exit of the village where you’ll be approached by Volo yet again. He’ll give you three Super Potions.
Fast travel to the Heights Camp as this location is very close to the Grandtree Arena.
Work your way over to the Grandtree Arena catching Pokémon and completing whatever research tasks you want on your way.
When you get there, you’ll run into Lian, the warden to Kleavor.

Lian will not allow you to pass and you’ll have to battle.
- Lian
- Goomy Lv. 15
Despite beating Lian in the battle, he still will not let you by. Irida will show up and instruct you to find a way to bring Kleavor its offering.
Report Back
Return to the camp at the Fieldlands and report your findings to Laventon.
This camp is pretty far from where you currently are, but you can fast travel back. Press – and then X and select Fieldlands Camp.
Laventon says he needs to head back to the lab, so that’s where we’re headed.
Back in the office, Laventon will be discussing the situation with you and Akari/Rei. He will do some thinking and come up with an incredibly elaborate plan. We can’t get close to Kleavor, so we’re going to throw the food from a distance. What a scientific mind we have here!

Laventon will invent Teatime Balls in an effort to help with this plan.
Leave the office and head back to Grandtree Arena with Mai.
Back to Grandtree Arena
When you return, you’ll be greeted by Adaman and Wyrdeer. You’ll be given a Celestica Flute.

Whenever you play this flute, you’ll be able to ride on Wyrdeer. You can do this by pressing the + button.
The Wyrdeer will also give you a Mind Plate.
After all that, you can head back to Grandtree. When you get there, it’ll be time to battle against Irida.
- Irida
- Glaceon Lv. 17
After beating Irida, you’ll now be able to carry out the plan to soothe Kleavor.
Who Told You to Put the Balm On

The snacks we just made are referred to as balms during this fight and every fight against frenzied Pokémon later on in the game.
Now it’s time to take on Kleavor. In order to win, you’re going to need to hit it with the balms (teatime balls) until the frenzy meter hits zero. You can also send out a Pokémon to battle against it if you can open up a hole in the defense. You can do this by diving out of the way close to a tree or wall. It’ll hit the barriers and be open for a brief moment. If you can win the battle, the guard will stay down for a few moments. While the guard is down, your balms will be more effective.
After beating Kleavor, you will receive an Insect Plate. Kleavor will then run away.
Irida will give you three Sitrus Berries and heal up your Pokémon.
Report Back…Again
After all that, return to Jubilife Village and speak to Kamado.
As soon as you get back, you’ll be speaking with Volo again. Afterwards, head to Kamado and fill him on what happened to end the mission.

The mission will close with yet another meal amongst your new found friends. You will also receive the recipe for Smoke Bombs here.
- Smoke Bomb Recipe
- 1 Caster Fern Leaf
- 1 Sootfoot Root
As night comes, you’ll make your way back to your room only to be interrupted by Vessa. This will introduce you to Request 22.
Vessa will ask you to fix a seal that if left unattended, will put the entire Hisui region in danger. She will give you the Odd Keystone.
After the conversation, there will be a purple wisp across the river that you need to go touch.

Go over the bridge and interact with the purple wisp. There will be more of these through out the Hisui region for you to interact with. Return to Vessa for rewards for collecting wisps.
As soon as that segment ends, you’ll be ushered in to the next day to the next main mission.
Arezu’s Perdicament
As the next day begins, you’ll be outside and will overhear a conversation. This is Arezu and she will notice and speak with you.

Arezu is a warden of the Diamond Clan. Speak to her and then go to Kamado’s office. Arezu will be speaking with him as well.
Kamado will give you your next mission and Cyllene will give you the details. You’ll be heading to the Crimson Mirelands this time.
Before you can go to the Mirelands, you will need to be at least Second Star rank. If you’re not there yet, head over to the Obsidian Fieldlands and complete more research tasks until you are at least Second Star.
When you’re ready, head toward the exit and you can battle Akari/Rei once again.
- Akari/Rei
- Mime Jr. Lv. 19
- Pikachu Lv. 20
You’ll be given the recipe for Stealth Sprays after the battle.
- Stealth Spray
- 1 Hopo Berry
- 3 Bugwort Blooms
You can now travel to the Mirelands and progress the story.
Crimson Mirelands

Once there, you’ll be speaking to Akari/Rei and Laventon.
You’ll be introduced to Space-Time Distortions during this conversation. You can enter these to find powerful and rare Pokémon.
Head out toward the objective marker catching new Pokémon and completing research tasks along the way.
When you reach the ruins, enter and you’ll meet up with Calaba of the Pearl Clan.

When you’re done speaking with her, Volo will show up and it’ll be time to battle him again.
- Volo
- Togepi Lv. 22
- Gible Lv. 22
Volo will heal your Pokémon after the battle. He will also ask you for help in finding the stolen wall fragment.
Follow the objective marker to a burned out campfire and you’ll be confronted by Charm, Clover and Coin of the Miss Fortune Sisters.

You’ll be forced into a battle against Coin.
- Coin
- Toxicroak Lv. 23
Defeat Coin and you’ll be given the Wall Fragment. Bring the fragment back to Volo and Calaba at the Solaceon Ruins.
After a brief conversation, you’ll now need to go to Sludge Mound in the Mirelands to find Ursaluna.
When you get there, Calaba will call Ursaluna and it’ll be time to battle it. It will be at level 26.

You’ll be given the Earth Plate from Ursaluna. You can now call Ursaluna to ride on. It will also dig for buried items for you while riding on it as well.
Go back to the Mirelands Camp and speak with Laventon. You’ll be interrupted by an Unown A. Unown will be added to your Pokédex.
You can now report back to Kamado. After the conversation in his office, you’ll need to travel back to the Mirelands.
Follow Your Nose
Ride Ursaluna in the Mirelands and use it track down Arezu. You’ll need to follow the blue sense from Ursaluna.

When you find Arezu, she will be injured after being chased by a Pokémon. After the ensuing conversation, it’ll be time to go to the Brava Arena in the Mirelands to quell Lilligant.
Meet with Adaman at Brava Arena. You’re going to employ the same strategies that you did when we took on Kleavor.

After quelling it, we’ll need to head back to Kamado. Speak with him to complete this mission.
A New Mission
On the next day, you’ll be speaking to Arezu.
Kamado will interrupt during this conversation and take you with him to Prelude Beach.
There will be a new group of people on the beach that have just arrived in Hisui. Kamado is here welcoming them to Jubilife Village.

Akari/Rei will approach and the conversation will shortly end. Head to Kamado’s office when you’re ready to progress.
When you get back you’ll be given your next assignment. You’re going to be investigating Cobalt Coastlands. In order to enter the Coastlands, you’re going to need to be at least Third Star rank.
So, complete research tasks until you’re able to enter Cobalt Coastlands.
The Lordless Island
You’ll be stopped at the exit by Lian. He’ll give you two Grit Pebbles and three sacks of Grit Gravel.
Travel to the Cobalt Coastlands when you’re ready to go.
When you get there, Irida will play her flute and then battle you.
- Irida
- Glaceon Lv. 30
- Eevee Lv. 15
After the battle, she’ll heal your Pokémon. Now it’s time to find Palina. Head to the objective marker.

When you meet her, she’ll explain that you’ll need the help of Basculegion in order to surf across the waters of Hisui. She will also tell you where to find Iscan. He can be found over in Bathers’ Lagoon.
You’ll run into Volo on your way to meet Iscan. You’ll get more background information on the Plates you’ve been collecting.
When you reach Iscan’s home, he will tell you how to attract Basculegion. You’re going to need to prepare its favorite snack. This is going to require finding a Dusclops as well. These show up at night in Deadwood Haunt. You’re going to need to catch a Dusclops and bring it back to Iscan.

Iscan will hesitantly make the required snack when you return with a Dusclops. You’ll obtain the Ball of Basulegion Food.
Return to the beach at Ginkgo Landing and meet with Iscan again. You’ll be joined by Palina as Iscan plays the flute to call Basculegion.

Basculegion will appear and you will feed it the snack. You’ll also play your flute for it and it will then join you. You will also receive the Splash Plate. You’ll now be able to surf across water by riding on Basculegion.
Just as a conversation between Iscan and Palina wraps up, you’ll be interrupted by the Miss Fortune Sisters.
They will kidnap one of the Growlithe from Palina and then quickly leave. You’ll now be helping return the stolen Growlithe. They took it to Firespit Island.
Spit Hot Fire
Hop on to Basculgion and make your way toward Firespit Island.
Reach the island and continue up the slope forward toward the center. Bet you can’t guess what type of Pokémon you’ll be encountering here on Firespit Island.
When you reach the objective, it’ll be time to battle against Clover, Coin and Charm.
- Clover
- Abomasnow Lv. 35
- Coin
- Toxicroak Lv. 34
- Charm
- Rhydon Lv. 34
- Gengar Lv. 35
After the battle, one of Palina’s Growlith will evolve into Arcanine. The Arcanine will also be struck by the lightning that has made the other Pokémon become frenzied.
The Miss Fortune Sisters will take off and it’ll be up to you to quell the frenzied Arcanine.

Pay attention to its eyes. They will glow just before it attacks. You can use this to time your lunge and avoid taking any damage. When it powers up with the fire balls in front of it, all you have to do is quickly keep hitting it with balms to cancel out that attack.
Quell the Arcanine and you’ll be given the Flame Plate.
Just then, a second Arcanine will appear and order will be restored to this part of the Hisui region.
When that’s all said and done, head back to Kamado and brief him of the events. This will be the end of this mission.
- In An Unfamiliar Land
- The Galaxy Team’s Entry Trial
- The Basics of Crafting
- Getting to Work on Research Tasks
- A Request From Mai
- Summoned by Commander Kamado
- The Frenzy of the Lord of the Woods
- Arezu’s Perdicament
- A New Mission
- The Lordless Island
Page 4
- Scaling Perilous Heights
- The Slumbering Lord of the Tundra
- Disaster Looming
- The Trial of Lake Verity
- The Trial of Lake Acuity
- The Trial of Lake Valor
- Atop Mount Coronent
- The Counterpart
- A New Day Dawns
- The Researcher of Myths
- The Plate of Prelude Beach
- The Plates of the Lakes
- The Plate of Firespit Island
- The Plate of Moonview Island
- The Plate of Snowpoint Temple
- Seeking The Remaining Plates
Scaling Perilous Heights
The next day you’ll be approached by an NPC who will tell you it’s time to meet with Kamado again. Your next destination will be the Coronet Highlands. We need to quell a frenzied Electrode.
During this conversation, we’ll meet a new character, Melli.

When you exit the HQ, it’ll be time to battle against Adaman.
- Adaman
- Leafeon Lv. 36
- Eevee Lv. 18
Make quick work of Adaman and then Cyllene will give you your next assignment. You know the drill by now. You’re going to need to reach Fourth Star rank before you can enter the next location.
When you’re ready to go, Cyllene will give you the recipe for Leaden Balls and Hyper Potions.
- Leaden Ball Recipe
- 1 Apricorn
- 1 Black Tumblestone
- 1 Iron Chunk
- Hyper Potion Recipe
- 1 Super Potion
- 1 Vivichoke
Go to the training grounds in Jubilife Village to meet Ingo. Speak with him and then travel to the Coronent Highlands.

Meet with Ingo at mouth of the Wayward Cave in the Highlands. Melli will appear and want to battle, but will be turned down for now.
Enter the cave and work your way toward Electrode. Follow Ingo inside of the cave. He’ll briefly leave you for a short section of the cave near the exit.
Exit the cave and head around to the objective to find Melli and Ingo.
You’ll need to battle Melli here in order to gain access to the frenzied Electrode.
- Melli
- Skuntank Lv. 40
Beat Melli and enter the Ancient Quarry. A cutscene will follow with some speculation on the rift in the sky.
Continue through the Quarry out to the other side and make for the objective marker. Don’t forget to catch some Pokémon and complete research tasks along the way.
You’ll meet up with Ingo again and he will have a potential solution to his memory loss. A battle.
- Ingo
- Machoke Lv. 41
- Gliscor Lv. 42
- Tangela Lv. 41
After you beat Ingo, he will call Sneasler.

You’ll play your Flute for Sneasler and it will give you the Toxic Plate and join you as well.
With Sneasler on your side, you’ll be able to ride on it and climb the sides of cliffs and ledges. Use your new found friend to help you reach Electrode at Moonview Arena.
When you reach the location, you will need to beat Melli again.
- Melli
- Skuntank Lv. 44
- Zubat Lv. 22
- Skorupi Lv. 22
Beat Melli and then Adaman will give you the necessary balms to take on Electrode.

For the fight against Electrode, you’re going to want to keep moving. You can throw a couple balms here and there, but stay focused on moving. You’re going to need to dodge exploding Voltorbs while balls of electricity chase you. Keep running and eventually Electrode will jump and land with a radius around it. Stay out of this radius and it’ll explode knocking itself out. Throw out a Pokémon, battle it and beat it. Then you can spam the balms. You can repeat this several times until you win.
You’ll be given the Zap Plate when you quell the Electrode.
Return to Kamado to complete the mission.
The Slumbering Lord of the Tundra
You’ll be speaking to Adaman, Irida and Kamado the next day.
It’ll be time to go after the final Lord, Avalugg. Before you can go, you will need to have reached Fifth Star rank.
You’ll be given the recipe for Wing Balls when you reach Fifth Star.
- Wing Ball Recipe
- 1 Apricorn
- 1 Sky Tumblestone
- 1 Iron Chunk
It’s time to make our way to the Alabaster Icelands.
Laventon and Akari/Rei will be waiting for you at the gate. It’ll be time for another battle against Akari/Rei.
- Akari/Rei
- Mr. Mime Lv. 46
- Staravia Lv. 46
- Pikachu Lv. 47
You can now leave for Alabaster Icelands after the battle.
Head for the objective where you’ll be introduced to Gaeric, Avalugg’s warden. There is a whole new batch of Pokémon for you to catch here.

Answer Gaeric’s questions and then you can battle him.
- Gaeric
- Glalie Lv. 48
- Froslass Lv. 24
Beat Gaeric and he will finally accept you. You’ll also meet Sabi here. We need to get ahold of her Braviary.

Climb up to Sabi from the back side of the hill she’s on.
She says she wont help you until you catch her. She used the word “catch” but this is not a race or anything. You just need to go meet her where the objective marker is located. Climb up the mountain with Sneasler and interact with her.
When you find her, she’ll move to another location. Chase her down again.
After finding her a second time, you’ll need to follow her into the Snowpoint Temple and solve a puzzle.
Puzzle Time!
Inside of Snowpoint Temple will be some statues with symbols on them. The symbols are Rock, Steel and Ice.

In order to solve the puzzle, you just need to remember or write down the order of the symbols. There are three doors. You’ll need to enter the symbols on the door in the order they appear on the statues leading up to the door. The order of the pattern is dictated by how the statues stare at each other. You need to follow the direction they are staring.
You can solve it yourself, or look below for the solutions.
- Door 1
- Rock
- Steel
- Ice
- Door 2
- Ice
- Rock
- Steel
- Rock
- Ice
- Door 3
- Steel
- Ice
- Rock
- Ice
- Steel
- Rock
Solve the three doors and meet Sabi at the top. Now it’s time for a battle.
- Sabi
- Rhyperior Lv. 50
- Magmortar Lv. 30
- Electivire Lv. 30
Head to the roof after the battle. Now its time to battle against Braviary.
- Braviary Lv. 54

After the battle, you’ll play your flute and Braviary will join you. You will receive the Sky Plate and you will now be able to fly across Hisui on Braviary.
Avalugg
Now you can fly over to Avalugg’s Legacy and pick up the Eternal Ice at the top.
After that, head to Icepeak Arena and get ready to face Avalugg.
When you get there, Volo will give you some tips of what kinds of attacks to expect during the fight.

This fight is all about dodging and evading. Avalugg will throw out a pattern of attacks toward you from a distance. All you need to do is avoid them. Avalugg is so big that it’ll stay in one spot. You’ll be on a platform with plenty of time to see what attack is coming and where to go to evade it. The one attack that may cause some trouble is when it shoots icicles like projectiles at you. For this, you need to keep your camera somewhat low looking up so that you can see the attack coming from the air. Roll out of the way just before the projectile reaches you to dodge it. If you roll too early, it’ll get you.
The other attack you should know about it is an ice beam like attack that it will sweep the entire platform with. This one is easy. All you have to do is roll through the beam. If timed correctly, you won’t take any damage.
After the halfway mark of its health is drained, the attacks will change up a little bit, but nothing major.
When your familiar with the attack pattern, you can get some balm hits in on it between and during certain attacks.
So, be on your toes and dodge, dip, duck, dive and dodge your way to victory and quell the mighty Avalugg.
When you take it down, you’ll be given the Icicle Plate.

You can now return to Kamado and complete this mission.
Disaster Looming
You’ll be awoken the next day with a loud noise. When you step outside, you’ll immediately notice that the sky has turned red.

A conversation with your companions will take place and it end with you getting the boot. You’ll be forced out of Galaxy Team and Jubilife Village until you can prove your innocence in the matter at hand.
Follow Cyllene out of town. You’ll be taken to the Obsidian Fieldlands where you must seek out Lian in Grandtree Arena.
Lian won’t be able to help us, so now we must ask Mai at the Worn Bridge for assistance.
Unfortunately for us, Mai will be a dead end as well.

But fret not! Help has arrived in the form of our old pal, Volo.
Volo will bring us to a place where we can lay our heads until we figure this thing out.
We’ll now be introduced to Mistress Cogita. She will allow us to stay here.

Cogita will tell us what we need to do to fix this situation we find ourselves.
When you step outside, you’ll receive a letter with an Abra. This Abra can be used to retrieve any Pokémon caught and sent to the pastures in Jubilife Village.
After that, it’s time to choose who will help us in our mission to fix things. Irida or Adaman. Your choice will have an effect on something later, but it ultimately doesn’t matter who you choose here. You will not miss anything because of this choice.
Make your choice and the mission will end. You’ll now have three outstanding missions to complete.
- In An Unfamiliar Land
- The Galaxy Team’s Entry Trial
- The Basics of Crafting
- Getting to Work on Research Tasks
- A Request From Mai
- Summoned by Commander Kamado
- The Frenzy of the Lord of the Woods
- Arezu’s Perdicament
- A New Mission
- The Lordless Island
- Scaling Perilous Heights
- The Slumbering Lord of the Tundra
- Disaster Looming
Page 5
- The Trial of Lake Verity
- The Trial of Lake Acuity
- The Trial of Lake Valor
- Atop Mount Coronent
- The Counterpart
- A New Day Dawns
- The Researcher of Myths
- The Plate of Prelude Beach
- The Plates of the Lakes
- The Plate of Firespit Island
- The Plate of Moonview Island
- The Plate of Snowpoint Temple
- Seeking The Remaining Plates
The Trial of Lake Verity
Travel to the Obsidian Fieldlands. Lake Verity is on the west side of the area.

Go to the middle of the lake and meet with Volo and Irida/Adaman. You’ll use your Arc Phone to open up the cave.
Enter the cave and you’ll find a Goodra waiting for you.
Goodra is a dragon/steel type. It is weak against fighting and ground type attacks against it.
- Goodra Lv. 58
You can defeat or capture Goodra to advance the story. If you don’t catch it, don’t worry. It’s not missable. You can catch Goomy in the Holm of Trials in the Mirelands and then evolve it.
After the battle, Mesprit will appear

Answer Mesprit’s questions and it will give you Mesprit’s Plume.
Exit the cave and this mission will be completed. There won’t be an on screen message, but we can now move on to the next lake.
The Trial of Lake Acuity
You’ll be taken back to Cogita’s place after exiting the Fieldlands.
Prepare whatever you need and then take off to Lake Acuity in the Alabaster Icelands.

Reach the lake and go to the center again. You’ll once again use your Arc Phone to open the cave.
Head inside and get ready to battle against an Alpha Zoroark. This is a normal and ghost type, so dark type moves will have the advantage here. Just like before, this is not the only way to catch Zoroark, so don’t worry if you miss it.
Zoroark Lv. 58

Uxie will appear after the battle. Answer the question correctly and you’ll be given Uxie’s Claw.
- Combee. Zubat. Unown. Magneton. Dusclops. How many are their eyes?
- 60131
Exit the cave and return to Cogita to complete this mission.
The Trial of Lake Valor
Leave Cojita’s place and go to the Crimson Mirelands.

Head to the center of the lake one more time.
Enter the cave with the assistance of your Arc Phone and battle the Overqwil. Overqwil is a dark/poison type. You can use electric, fighting or ghost type attacks to counter it.
- Overqwil Lv. 58
Beat or catch the Overqwil and Azelf will appear.

For this, you’re going to be throwing balms at Azelf. You won’t be able to hit it and it will as you if you want to stop. You have to keep going. It will ask you three times if you want to give up. Don’t give up. You’ll hit it after the third question and will be given Azelf’s Fang.
Exit the cave and you’ll be transported to the Shrouded Ruins where you’ll complete the Red Chain with the help of the three Lake Guardians.

After a few cutscenes, you’ll be back in Jubilife Village filling in Cyllene on what you’ve found. Afterwards, she’ll give you your next mission.
Atop Mount Coronent
After getting your next mission, its time to leave Jubilife Village and make for Mount Coronent where Kamado has already left for.
You’ll speak to a number of NPCs in a few cutscenes, and then it’ll be time to take care of business.
Head for Mount Coronent.
On your way to Kamado, you’ll run into Beni from the Wallflower who will want to battle you.
- Beni
- Mismagius Lv. 59
- Sneasler Lv. 59
- Gardevoir Lv. 60
- Gallade Lv. 60

Continue up the path to the top of the mountain.
You’ll run into your companions again for another quick conversation.
At the top, you’ll find Kamado lookin ready for battle. Speak to him and the conversation will end in a battle.

- Kamado
- Braviary Lv. 61
- Golem Lv. 61
- Snorlax Lv. 62
- Clefable Lv. 61
With Kamado defeated, we can finally reach the top. Before going up here, make sure you’re loaded up on Poké Balls. Kamado will also give you 10 Ultra Balls at the top.
This is where our choice from earlier will come into play. If you chose to take Irida with you, Palkia will appear. If you took Adaman, it will be Dialga that shows up.
You’ll immediately be thrust into battle. Palkia/Dialga will be at level 65 and you have to catch it in order to progress the story. If you beat it, you’ll start the battle over again.
Don’t worry, you’ll have an opportunity to catch the one that didn’t show up for you a little bit later.

Although this game follows a different formula than the previous mainline Pokémon games, the strategy of catching a legendary remains the same.
You’re going to want to whittle down the health as low as you can and inflict a status effect like paralysis on it and then spam balls.
After you’ve caught either Palkia or Dialga, the opposite one will appear before you, but you and your group will retreat back to camp.
During the conversation, you’ll hand the plates you’ve been collecting from the frenzied Pokémon over to Laventon and he will have an idea on what to craft, but we need to find some Origin Ore first.
On to the next mission!
- In An Unfamiliar Land
- The Galaxy Team’s Entry Trial
- The Basics of Crafting
- Getting to Work on Research Tasks
- A Request From Mai
- Summoned by Commander Kamado
- The Frenzy of the Lord of the Woods
- Arezu’s Perdicament
- A New Mission
- The Lordless Island
- Scaling Perilous Heights
- The Slumbering Lord of the Tundra
- Disaster Looming
- The Trial of Lake Verity
- The Trial of Lake Acuity
- The Trial of Lake Valor
- Atop Mount Coronent
Page 6
- The Counterpart
- A New Day Dawns
- The Researcher of Myths
- The Plate of Prelude Beach
- The Plates of the Lakes
- The Plate of Firespit Island
- The Plate of Moonview Island
- The Plate of Snowpoint Temple
- Seeking The Remaining Plates
The Counterpart
As the mission begins, some of your other companions will arrive in an effort to assist you.
We will also get our next location. The Primeval Grotto. We need to go here and grab some Origin Ore.
When you get there, interact with the glowing orange ore in the wall.

Just then, you’ll be interrupted by the Miss Fortune Sisters. A battle against Charm is coming up next.
- Charm
- Rhydon Lv. 61
- Gengar Lv. 62
The sisters will flee after the battle leaving the ore for you.
Lian will mine the ore and then give you the piece that you need.
Return to the camp and speak with Laventon. You and the group will be transported back to Jubilife Village where the Origin Ball will be crafted and given to you.

With the Origin Ball, we can now catch the frenzied Palkia/Dialga.
Head to the Temple of Sinnoh when you’re ready.
Cogita will be at the exit of town and will instruct you to bring the legendary that we already caught. So add it to your party.
The Temple of Doom
Return to the Temple of Sinnoh in the Coronent Highlands and get ready to face either Palkia or Dialga.
Volo will be in the cave and will be selling a slew of new items. You’ll be able to buy Great Balls, Ultra Balls and various healing items from him now.
You’ll meet up with your companions right before facing off against the frenzied legendary.

You’re going to want to stay on the run during this fight. Hit it with balms as much as you can while staying clear of the attacks. The attacks are pretty well telegraphed, so you’ll know when they’re coming and where they’re going. Keep running and smash that dodge button.
After the battle, you’ll catch either Palkia or Dialga in a cutscene with the Origin Ball.

And with that, the credits will begin to roll.
Congratulations, the main story is now complete!
A New Day Dawns
After the credits are finished, your Arc Phone will be beeping and you’ll awake in your room.
Exit your room and speak to Akari/Rei. They’ll tell you to meet them in Survey Corps HQ.
Speak to Cyllene and she will pair you up with Volo in order to learn all about the Pokémon of Hisui and to complete the Pokédex.

This very brief mission will be completed and we’ll roll into the next one.
The Researcher of Myths
Exit the Galaxy Team HQ and travel to the Obsidian Fieldlands to meet Volo at the Heights Camp.
Speak with him and he will show you some drawings on the wall behind the camp.

Volo will tell you a little more about the plates we’ve been collecting and that there are more to be found.
Our first stop for another plate will be in Grueling Grove.
When you reach Volo, an alpha Vespiquen will attack. Catch or defeat the Vespiquen and you’ll be given the Stone Plate.

From there, we need to go and visit Cogita at the Ancient Retreat.
Speak with her and she will give us some information on other powerful Pokémon to find. She’ll give you a list and make sure you ask about each one of them.
- The three lake Pokémon
- The volcano
- The crescent moon
- The temple giant
- The beginning
You’ll be given a new mission for each of the options that you select here.
The Researcher of Myths mission is now complete. We will now have five active missions in our log to work on.
The Plate of Prelude Beach
Leave Cogita’s place. When you get back to Jubilife Village, you’ll be met by Kamado. He will ask you to meet him at Prelude Beach.
Prepare for a battle against him at the beach.
When you’re ready, head down to the beach.
Approach Kamado and begin the battle.
- Kamado
- Golem Lv. 65
- Snorlax Lv. 66
- Clefable Lv. 65
- Heracross Lv. 65
- Braviary Lv. 65
Beat Kamado again and he will give you the Fist Plate.

- In An Unfamiliar Land
- The Galaxy Team’s Entry Trial
- The Basics of Crafting
- Getting to Work on Research Tasks
- A Request From Mai
- Summoned by Commander Kamado
- The Frenzy of the Lord of the Woods
- Arezu’s Perdicament
- A New Mission
- The Lordless Island
- Scaling Perilous Heights
- The Slumbering Lord of the Tundra
- Disaster Looming
- The Trial of Lake Verity
- The Trial of Lake Acuity
- The Trial of Lake Valor
- Atop Mount Coronent
- The Counterpart
- A New Day Dawns
- The Researcher of Myths
- The Plate of Prelude Beach
Page 7
- The Plates of the Lakes
- The Plate of Firespit Island
- The Plate of Moonview Island
- The Plate of Snowpoint Temple
- Seeking The Remaining Plates
The Plates of the Lakes
For the Lake Guardians, we’re going to be traveling back to where they spoke to us earlier in the game.
They all share the same weakness, so be sure to whip out some dark, ghost or bug type attacks against them.
All three of them will be at level 70.
You should have some Ultra Balls with you as well.
Firs up, Lake Verity in the Obsidian Fieldlands where we can find Mesprit.

One down, two to go. Next we’ll be heading to the Alabaster Icelands where Uxie can be found at Lake Acuity.

The final one, Azelf can be found over in the Crimson Mirelands at Lake Valor.

With all three of the Lake Guardians captured, we now have our hands on the Draco Plate.
The Plate of Firespit Island
Now, let’s head for Firespit Island in the Cobalt Coastlands.
Palina and Irida will greet you when you arrive in the Coastlands.
You can have a rematch with Arcanine here, if you wish. For this though, we’re gonna pass on the rematch for now and make our way passed Palina and toward the cave.
Enter the cave and Heatran will appear.
Heatran will put up a barrier around itself, so you won’t be able to battle it yet. Run around the area, pick up the mudballs and throw them at Heatran. Make sure to dodge its attacks.
Continue throwing mudballs at it until the barrier goes down. Once that happens, throw out a Pokémon and the battle will begin.

After you catch it, you’ll be given the Iron Plate and another mission will be completed.
The Plate of Moonview Arena
Time to travel to Moonview Arena in Coronent Highlands.
When you get there, Melli and Calaba will be standing by the entrance. They’ll fill you in on Cresselia if you don’t already know.
As soon as the battle starts, you’ll be confused by Cresselia and it’ll invert your controls. Make your way toward Cresselia fighting through the inverted controls and toss out a Pokémon when you get close to start the battle.
This is another psychic type, so dark and bug type moves will be useful here.
You’ll be given the Dread Plate upon catching it.

One more plate to go!
The Plate of Snowpoint Temple
For the final plate, we are going to go to Snowpoint Temple in the Alabaster Icelands.
Enter the temple and head to the back. Instead of going up the stairs, we’re going to take a right and go down the stairs.
Approach the door and you’ll run into Adaman with Sabi. Interact with the door and the plates you have will open it.
Follow the path around and down a few sets of stairs until you come face to face with Regigigas.
Approach it and the battle will start.

You’ll be given the Blank Plate when you catch it.
And with that, we have successfully collected all of the plates.
Seeking the Remaining Plates
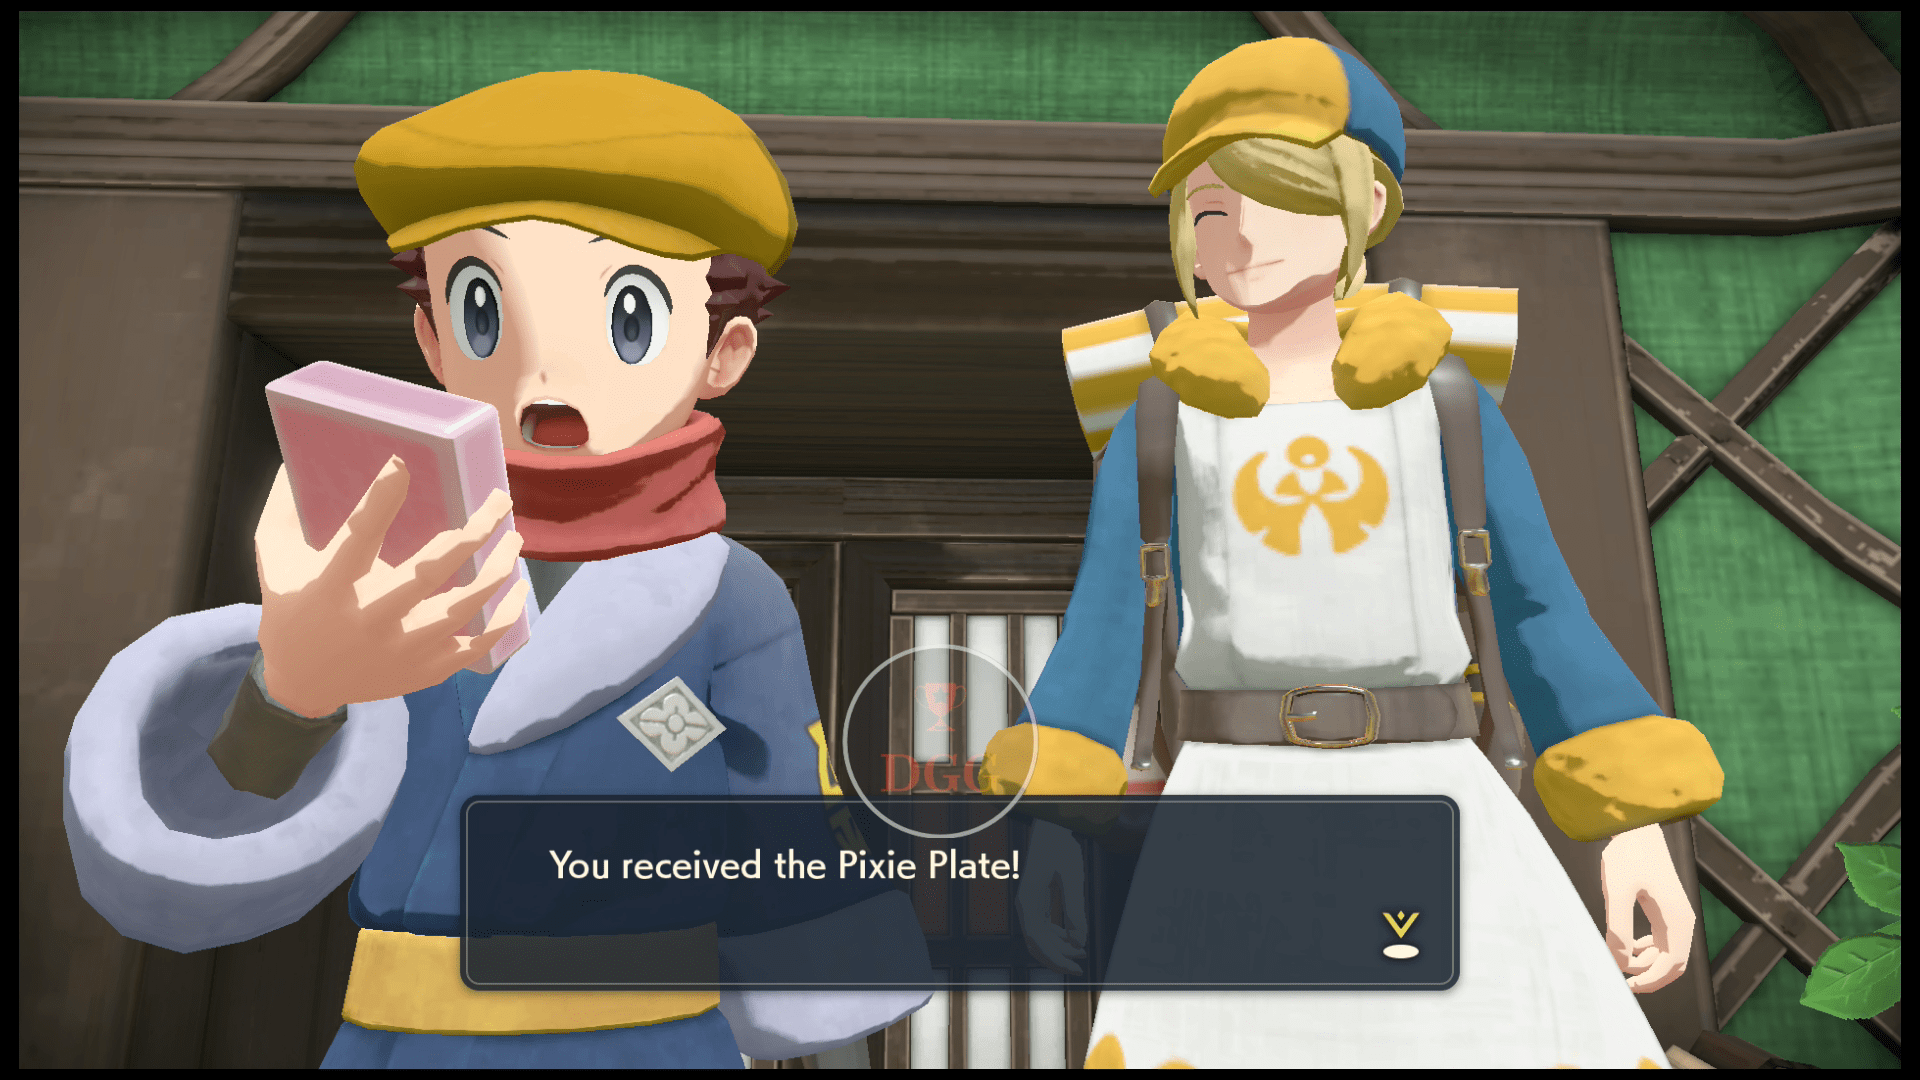
With all of the plates collected, head back to the Ancient Retreat to speak with Cogita.
Before we can get more information out of Cogita, she wants us to bring her some wood logs. We’re going to need to bring three of them.
You may already have enough in your inventory, if you’ve been picking them up. If not, they can be found on the ground throughout the various different regions.
When you return with the wood, Cogita will give you the Pixie Plate.
After getting the Pixie Plate, we need to now head to the Celestica Ruins with Volo. The ruins are found in Coronent Highlands.
Speak to Volo when you arrive.
GASP!
While speaking with Volo at the ruins, he’ll piece together our next target. Giratina.
We need to head up to the Temple of Sinnoh yet again. Before going, make sure to equip your strongest Pokémon in your party and stock up on as many healing and reviving items as you can. There is a pretty tough series of battles waiting for us up ahead. We are going to be battling three times in a row with no chance to heal our Pokémon in-between.
When you get to the top, Volo will reveal his true intentions and will try to take the plates we’ve gathered.

Get ready for a battle against Volo.
- Volo
- Spiritomb Lv. 68
- Togekiss Lv. 68
- Garchomp Lv. 68
- Arcanine Lv. 68
- Roserade Lv. 68
- Lucario Lv. 68
Defeat Volo and then Giratina will suddenly appear. Volo will battle you again using Giratina.
Defeat Giratina and you will have to battle it one more time, but in it’s Origin Forme.
Your Pokémon will not be healed in-between battles, unfortunately.
When battling against Volo and Giratina, you’re going to want to use fairy, ice and dragon type attacks.
Fairy attacks are the most useful here as they are effective against both Volo’s party and Giratina. Dragon attacks are also very useful against Giratina and Garchomp.
Stuck?
If you’re having issues with this, there are a few Pokémon that you can go catch to really help you.
First up is Blissey. Blissey can be found in the Obsidian Falls of the Obsidian Fieldlands. Blissely is formadable because it has a lot of health and packs fairy attack types.
Another option is Garchomp. There is a level 85 Garchomp in the Avalanche Slopes over in the Alabaster Icelands. You can actually leave the Icelands, travel back and Garchomp will respawn whether you beat it or caught it. So you can catch multiple Garchomp and roll with a few of them, if you’d like.
Last up is Cresselia. Cresselia will give you access to strong fairy type attacks as well as Blissey.
While in the battle, don’t forget to look at the attack order as well. This can be used to your advantage greatly. You can strategically decide when the right time to use strong attacks or agile attacks just by looking at the attack order and how it changes based on strong or agile attacks. You can often give yourself back to back attacks. If you see that Volo has double attacks coming next, you can go ahead and use strong attacks. You’re already going to be hit twice, so you may as well get some extra damage out of it.
If you’re unsure what attack from what Pokémon will do the most damage, press Down on the D-Pad when it’s your turn and look at your Pokémon’s attacks. You’ll be able to see what attacks are effective, super effective or will have no effect.

When you win all three battles, you’ll be given the Spooky Plate from Volo.
This mission will finally be completed.
Extras
When you return to Jubilife Village, you’ll be greeted by Laventon you’ll be given Request 91. This request will let you track down and catch Giratina in the Cobalt Coastlands.
The Deified Pokémon
Your Celestica Flute will transform into the Azure Flute to open up the final mission.

The flute will allow you to call Arceus. But first, you will need to catch all 237 Pokémon in the game.
After you’ve caught them all, you can return and play the Azure Flute summon Arceus. You’ll be given the Mysterious Balm to throw at it during battle.