
Welcome to the Deathloop Trophy guide! The latest from Arkane brings 55 Trophies to earn. This is an overall fun list to complete. There are no collectible grinds this time around. There are also no missable Trophies to worry about here. There are also no difficulty related Trophies.
You’re going to want to play through the story first and get that out of the way. There is free roam after completing the story. Not only will you be able to clean up any remaining Trophies post game, but a good chunk of what is needed for some of these Trophies won’t be possible until after you’ve completed the story anyway. It’ll also benefit you when going for certain Trophies later on to learn the maps as you make your way through the story.
This list mostly focuses on killing the targets (Visionaries) in unique ways. Nothing is overly difficult here, but there are a few that may take a couple of tries.
There are two online Trophies to be earned here. I know, online Trophies are the worst, but fear not. These are not that bad. They can also be boosted with a friend if you’re having any issues or if you just don’t want to deal with them.
 Into Eternity
Collect all other trophies.

 Nowhere To Run To
Take out an invading Julianna while playing as Colt.
This can be earned offline against an AI controlled Julianna.
Eventually as you make your way through the early part of the story, you’ll be introduced to the invasion mechanic. Julianna will invade your game and she will be trying to kill you. In order to earn this, you will need to kill her. If you don’t kill her during that first invasion, don’t worry. There will be more invasions as you play through the rest of the game.
 Nowhere To Hide
While playing as Julianna, cross Colt off your kill list.
Online
In order to earn this, you’re going to have to select “Protect the Loop” from the main start menu.
You’re going to need to invade another player’s game as Julia and kill the other player (Colt). This will only count if kill Colt and end his loop. Don’t forget that the player playing as Colt will have Reprise equipped. So, the other player is going to respawn if they have any left.
If you’re having trouble with this, it can be boosted with a friend. The player playing as Colt must have their online settings set to “Friends Only.” The player playing as Julianna must then select “Invade Friend’s Timeline” and then select the PSN ID of who you are boosting with.
 One Perfect Day
Complete ‘Ending It.’
This is an unmissable story related Trophy. This is earned by beating the story.
 Welcome To Blackreef
Complete ‘The Longest Day.
This is an unmissable story related Trophy.
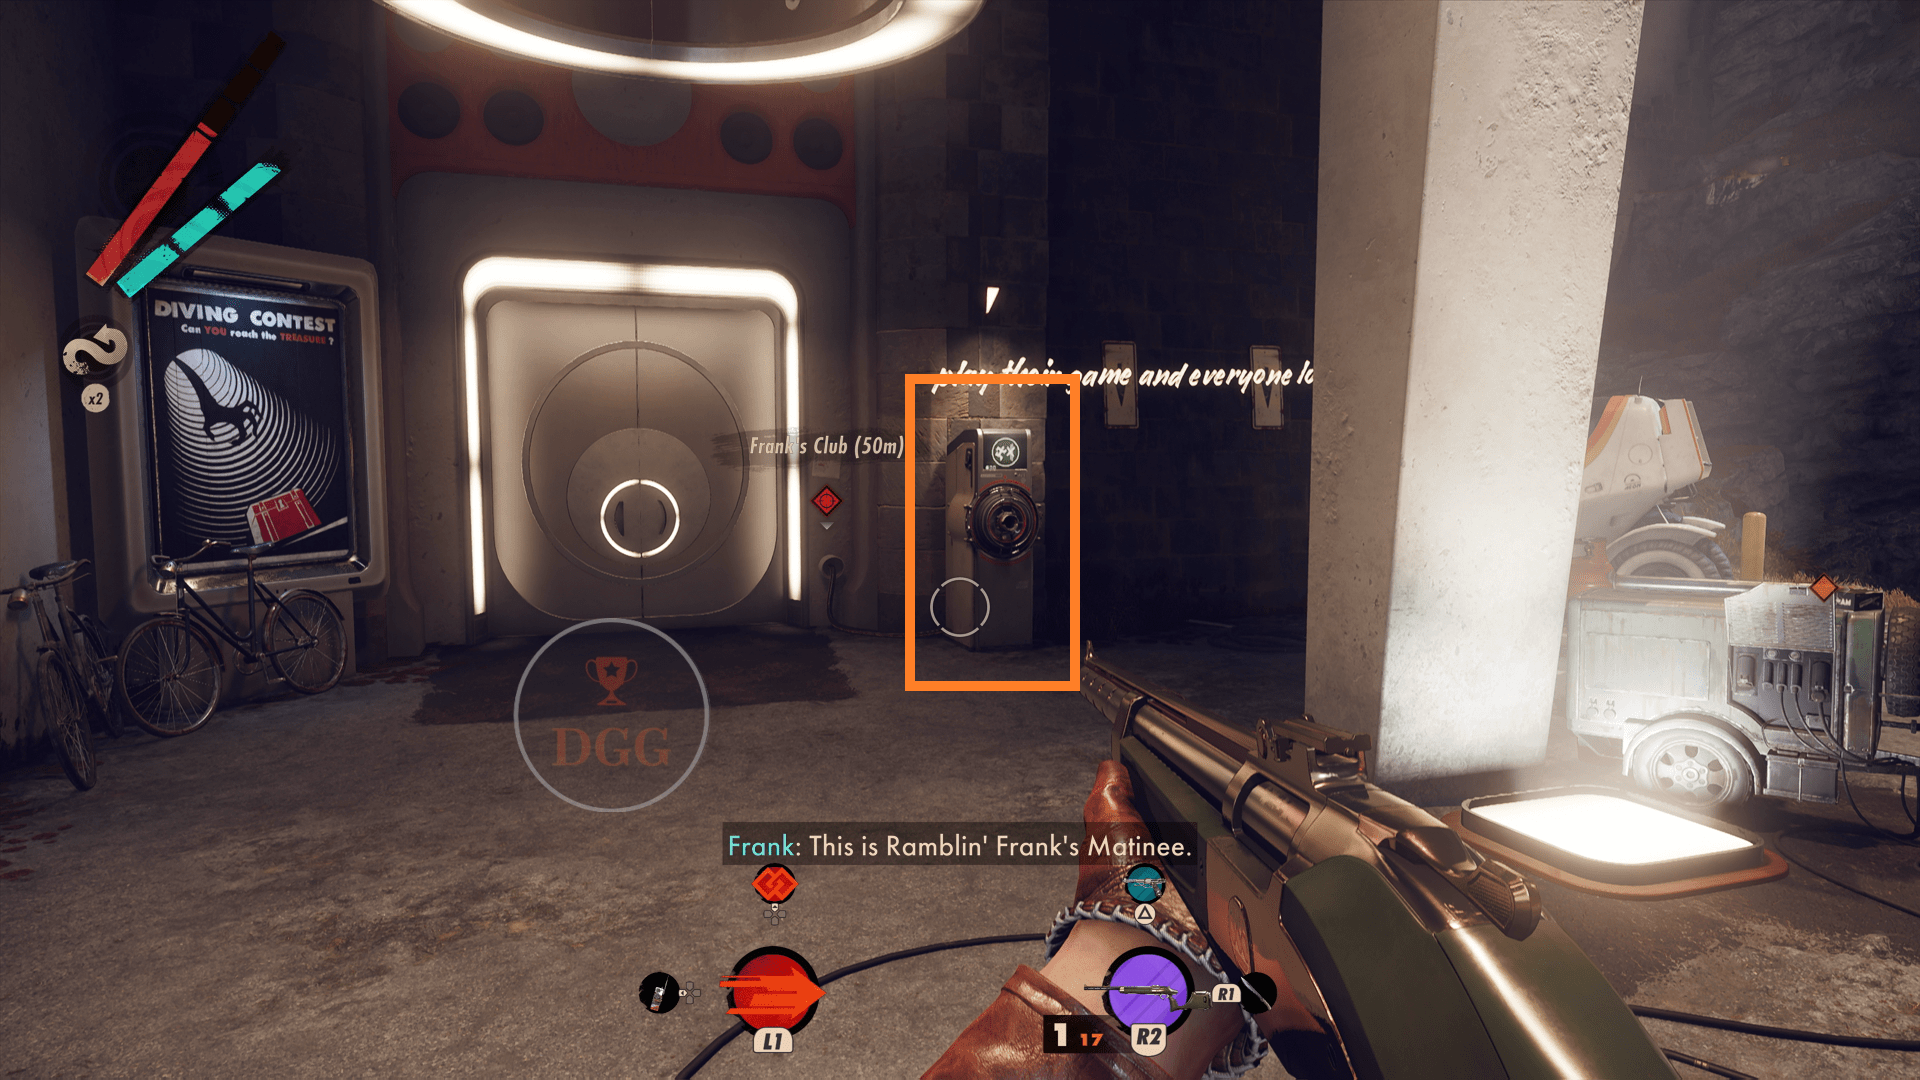
 Baby, You’re a Firework
Complete ‘The Ballad of Ramblin’ Frank.’
This is an unmissable story related Trophy.
 Egoraphobia
Complete ‘Lost in Transmission.’
This is an unmissable story related Trophy.
 Dangerous Liasion
Complete ‘Afternoon Delight.’
This is an unmissable story related Trophy.
 An Offer She Can’t Refuse
Complete ‘What Wenjies Want.’
This is an unmissable story related Trophy.
 Beyond The Horizon
Complete ‘Radio Silence.’
This is an unmissable story related Trophy.
 Gooooood Morning, Blackreef!
Escape to Updaam.
This is an unmissable story related Trophy.
 All The Live-Long Day
Survive all 4 time periods in one day.
Each day has 4 different time periods. When you complete all 4, the loop will reset. For this Trophy, you will need to not die during all 4 time periods in the same day. Reprise gives you 2 respawns. You can die with Reprise equipped, but you can’t run out of respawns during a time period. This is negated when the day resets upon dying.
 Die, Die, And Die Again
After acquiring Reprise, die for real – or what passes for real in the Loop.
Reprise is a slab that is automatically given to you as part of the story in the beginning. Reprise will give you 2 respawns when dying. In order to earn this, you will need to die 2 times to use the respawns and then die again to end the day and reset the loop.
 Dead Drop
Absorb Residuum from a body – like some kind of temporal sponge.
You’ll be given the ability to absorb Residuum as part of the story. This is something that won’t be available to you right away.
Once you have the ability, you’ll be able to interact with rainbow shining objects in the environment by absorbing the Residium from them. This will include bodies, but not every body. There are only a few that you can absorb. You can absorb yourself when die and respawn, you can absorb Julianna after you kill her and then you can absorb the marked targets you are hunting. These will just be marked as shiny bodies of the character. Hold Square near them to absorb them.

 Pieces Of Eight
While playing as Colt, kill Frank. Or Charlie. Or Fia. Or Wenjie. Or Aleksis. Or Harriet. Egor will do as well.
This is an unmissable story related Trophy.
 Ensemble Tragedy
Kill each Visionary at least once.
This is an unmissable story related Trophy. You will need to kill all of the Visionaries at least once in order to complete the story.
 Alpha Burger
Kill Aleksis using his meat grinder.
This is done in Updaam in the evening.
You’re going to need to stealthily make your way through the party and get up into the rafters above the main room of the mansion. In this room, you’ll find a stage where party goers will tell jokes. When they tell a bad joke, the floor underneath them will open and they will fall into the meat grinder.
Wait up here and Aleksis will eventually come to the microphone and speak. It’s going to take a few minutes of waiting, but don’t worry. The NPCs below will not see you up in the rafters.
When your above the stage looking down, there will be a button to the left above some signs that you’ll need to stand on. If you press this button, you will open up the floor on the stage and drop the person into the grinder. So wait up here for Aleksis to take the stage and speak. When he does, push the button to drop him in.
You identify Aleksis by the weapons he carries. He will always have 2 gold weapons on him.

 Power Chord
Kill Frank using a Slab ability. Take a bow.
Frank is found in a recording booth in Fristad Rock in the morning. The main doors will be locked until you use a ClassPass machine outside. This will be disable your slabs when active.
You can use the ClassPass to gain entry and then turn it off by using the ClassPass machine on the floor above the recording booth where Frank is. There are also a couple of vents that you can crouch through to bypass the ClassPass altogether. It doesn’t matter how you get in, just as long as you have use of your Slabs when going to kill Frank.
There are a few ways to get this done, but I found it easiest to use Nexus. There are 2 doors that can get into the sound booth. The one on the left will have a button next to it that will unlock the doors.
There are 3 enemies inside. Frank and 2 guards. When the doors open, use Nexus to link them all together and then shoot one of the guards. This will kill them all simultaneously and pop the Trophy.
 Judgement Day
Kill Harriet with poisonous gas.
So, I found this easiest done by killing Harriet twice.
First, kill her in any way that you want. After she’s dead, make sure you pick up her weapon called “The Fourpounder.” There are other versions of this weapon, but Harriet’s will deploy gas when fired. So it has to be hers specifically.
After you’ve picked up her weapon, you will need to infuse it with Residuum so that you will have it across multiple loops.
During the next loop, take her Fourpounder with you and go after her again. All you have to do is fire that weapon at her and let the gas kill her. It may take a few shots, but make sure to not kill her with a bullet. It has to be the gas that kills her.
 Game Over
Kill Charlie within the rules of Condition Detachment.
First, you will need to head to Fristad Rock in the afternoon. Go to the bunker with the big tower on top of it. Go inside the bunker and pick up the documents and listen to the recording about hacking 2-Bit. Then, interact with the console to start an uplink. You’ll then be shown a map of three uplink dishes. Like the codes in the game, these dishes can be in different spots.


All you need to do is find 1 of the 3 uplink dishes. Once you find one, hack it with the Hackamajig to begin the upload. Once that starts, you’re going to have to fight off a wave of enemies that will rush you and attack the 3 dishes. Do not let them destroy the dishes. After the upload is complete, return to the console in the bunker. Upload the new 2-Bit commands by selecting the hack option.

After you’ve hacked 2-Bit, exit the level and then fast forward time until the next day. Then, go to Updaam at noon and head for Charlie’s location. You can actually select the objective of changing commands for Charlie’s game in the Discoveries section of the Updaam objectives. This will mark the location with a white diamond on your screen.
Get inside and go to the second floor. Hack the door with the Hackamajig and interact with 2-Bit. Choose the option to change the invader to Charlie. Make sure that you don’t kill all of the eternalists in here on your way to 2-Bit. When you choose to make Charlie the invader, the eternalists will be after him as well as you. This will pop when an eternalist kills Charlie.
 Quantum Solution
Kill all versions of Wenjie within a 90-second period. Simple.
This is earned in the Complex in the afternoon.
Before starting make sure you’ve got strong weapons equipped. For me, I took the MG-1 Pepper Mill and the Strelak 50-50. For the Slabs, I took Havoc and Nexus.
Run through the lab killing every single Wenjie. They’ll be marked by red icons and they’ll come toward you as you make your way through the lab. Run through killing them as quickly as you can.
There are 2 cameras in the center circular room that will begin depressurizing the room which will kill you if you’re seen by them. Destroy those when entering to avoid that.
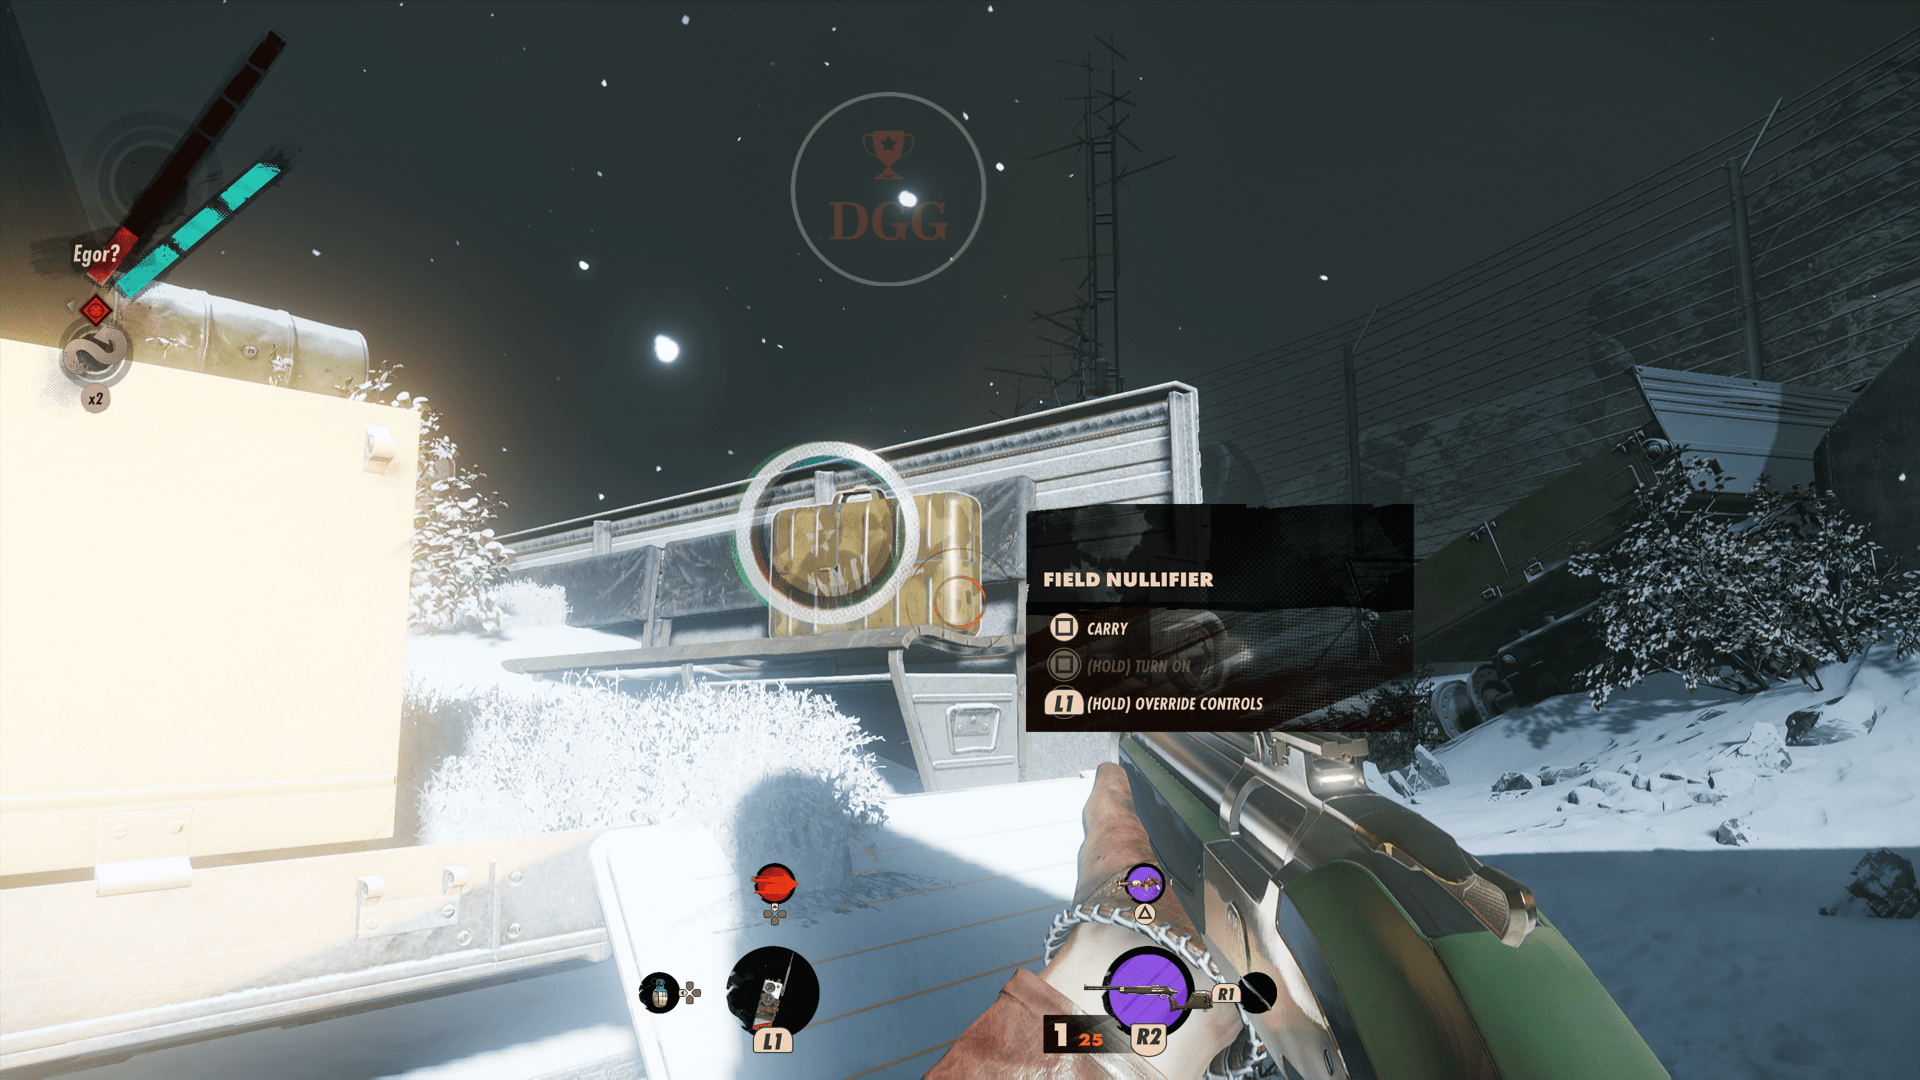
 Not-So-Invisible Man
Kill Egor while he’s under the influence of a nullifier.
This is earned in The Complex in the evening.
Egor will be using Aether to hide himself as he snipes at you from a distance. In the area where you find him are several nullifiers. These look like briefcases just like the turrets. You can hack these, pick them up and move them around the boss fight area.
The nullifiers will create a radius that disables Slabs for you and the enemy.
What you’re going to need to do is carry a nullifier near Egor and activate it. Kill Egor while he is inside of the nullifier’s radius. He can move around a lot, so feel free to set up multiple nullifiers just in case he moves. When you do this, make sure you’re ready to kill him because the nullifier will also disable your Reprise ability. The loop will end if he kills you inside of the nullifier radius.

 Didn’t See It Coming
Kill Fia without causing a deadly reaction.
This is earned at Fristad Rock at noon.
Head to Fia’s location in the bunker. Once inside the bunker, you have to take this section stealthily. If you’re spotted, Fia will detonate the reactor which will auto kill you no matter how many respawns you have. Dying from that will end your day.
So, sneak through silently killing or avoiding enemies. There are two paths you can take here. You can sneak into her room and kill her before she can arm the reactor or you can disarm the reactor before killing her.
The reactor can be disarmed underneath Fia’s room. You will still need to sneak here as you won’t have much time to disarm if Fia is alerted. You will need to cut different colored wires in a randomized order to disarm the reactor. Your wire solution is found in a room on a desk with blueprints on it right after entering the bunker. It is directly across from the locked room that has a locked door that requires a battery to open. The colored wires will be displayed on the blueprints with numbers next to them. These numbers are the order you need to cut them in. Kill Fia after disarming the reactor.
You can also just sneak into her room and kill her. Be sure to stay crouched and take it slow. Hack the cameras and turrets while silently taking out enemies with your machete. You can use Nexus to link enemies together so you can take out multiple with a single kill.
 Violent Delights
Kill Charlie and Fia with a single bullet.
This one is going to take a bit to set up. You will need to first complete the “Afternoon Delight” Visionary Lead before you can pull this off.
After completing “Afternoon Delights” you will now have access to Charlie and Fia’s secret meeting place. Fast Forward time until you get both Charlie and Fia together in the same location selection. When you see both targets in the same location, go there and head back to their secret meeting place. Make sure you have the Nexus Slab equipped as well. Once you get into their secret place, link them together with Nexus and shoot one of them in the head. This will kill them both with 1 shot.

 Ghost At The Feast
Kill 3 targets at Aleksis’ party without being seen. Leave Updaam satisfied, knowing you made the party a better place.
This won’t be obtainable until you have completed the story. Completing all of the Visionary Threads will show you how to set things up so that there are 3 Visionaries at Aleksis’ party. They will be Aleksis, Egor and Wenjie.
It’s important to note that when go for this, you will need to interact with the invisible console with a nullifier to reveal it. After that, input the code you used during the story. This is found in the Complex at noon. Again, you will have had to go through this step in order to complete the game’s story, but it will be required to do each time you want to set up all 3 targets for the party.
After setting this up, it can be earned in Updaam in the evening.
I found this to be easiest done by killing Aleksis by dropping him into the meat grinder first. Take the same route you took for the “Alpha Burger” Trophy. Egor and Wenjie can be found on the rooftop. The most efficient way of taking them out is by using Nexus to link them together with the other NPCs on the roof and then shoot one of the eternalists while they’re linked to kill them all. I know the Trophy description says “3 targets,” but killing the eternalists won’t void this.
You cannot be spotted by anyone while at the party. If the icon above an NPC’s head turns red, this will no longer be obtainable for that run. The yellow icon is fine, just as long as it doesn’t go full red. If you’re spotted or mess anything up, just pause the game and exit out to the main menu and try again.
It should also be noted that if you quit to the main menu because you want to try again, you will not have to do the invisible console step again. You’ll be able to continue in Updaam when relaunching your game.
 Forever Yours
Infuse a Slab.
You’ll be given the ability to infuse your gear as part of the story.
Slabs are the supernatural ability types. When you collect one, you’ll be given an ability to use. In order to earn this, you’re going to have to collect one during a time period by killing Julianna or a marked target. Then, you need to successfully make it out of the mission.
Once you’ve completed the mission and returned to the loadout screen, go to “Infuse Gear” on the left side of the screen. Once there, select whatever slab you want or have and spend 15,000 Residuum to infuse it.
 Spare No Expense
While playing as Colt, own all upgrades for a Slab.
There are 4 upgrades for each Slab. Luckily, tracking them all down is quite easy.
Killing a Visionary will grant you a Slab. Once you have their Slab, all you have to do is kill that same Visionary 4 more times and they’ll drop the upgrades that you need each time you kill them.
 Rip And Tear
As Colt, inflict a truckload of damage to Eternalists during a single use of Havoc.
First, you will need the Havoc Slab. You can get this by killing Fia. You can also get this by killing Julianna, but it will be a random drop.
I managed to get this done at Updaam at noon in Dorsey Square. Before starting make sure you’ve got strong weapons equipped. For me, I took the MG-1 Pepper Mill and the Strelak 50-50.
At Dorsey Square, there is pretty big group of enemies. Activate Havoc and open fire on the enemies. Kill as many as you can during a single use of Havoc. If Havoc ends and this didn’t pop, quit to the main menu and try again.
 Blink Of An Eye
As Colt, transport an enemy onto a mine using Shift.
First, you will need to have unlocked the Shift Slab by killing Charlie. You can also get this by killing Julianna, but it will be a random drop.
You will also need to have the Swapper upgrade for Shift. This can also be acquired by killing Charlie after you already have Shift.
With both of those unlocked, go into any location and find an enemy. Hold Left on the D-Pad and select the proximity charge. Set the charge down right in front of you and stand over it. After that, switch to Shift and hold L1 on an enemy and then press L2 to switch places with the enemy. If done correctly, the enemy you swapped with will be killed by the proximity mine.
You have to be pretty close to the enemy in order to pull this off, so stay crouched and hidden while doing this.
 Fwd: Fwd: Fwd: PAIN
As Colt, transmit damage over more than 20 meters using Nexus.
First, you will need the Nexus Slab. You can get this by killing Harriet. You can also get this by killing Julianna, but it will be a random drop.
When using this Slab, you can link enemies together so that when you kill one, the other linked enemies will die as well. It’s a very useful ability.
Once you have Nexus, find enemies that are near each other and link them together. Make sure they aren’t too close. You need them to be at least 20 meters apart. You can watch their patrolling pattern and see if they get far enough away from each other before using Nexus. Link them together when they get close and wait for them to spread before shooting one of them. This will pop instantly if the distance was correct.
Remember, the link will be timed. The duration of your power meter is how long you’ll have until they unlink. This is something that will probably take a few tries to pull off.
 Death Is In The Air
As Colt, achieve 3 airborne headshots on enemies you’ve launched using Karnesis.
First, you will need to get the Karnesis Slab. You can get this by killing Aleksis in Updaam in the Evening. You can also get this by killing Julianna, but it will be a random drop.
You’re going to have to use Karnesis to throw an enemy up in the air and then kill them with a headshot while they’re in the air. You’ll need to do this on 3 different enemies. This must also be done in the same time period. If you exit after doing 2, the counter will reset.
It’s not required, but it can make things easier. The Karnesis upgrade “Suspension” will keep enemies in the air a little bit longer.
 Don’t Mind Me
While using Aether as Colt, kill 3 enemies without alerting nearby enemies.
You can acquire the Aether Slab by killing Egor in The Complex in the evening.
You don’t have to kill 3 enemies with 1 activation of Aether. It can be done with mulitple uses of the ability.
Equip Aether and load up any location. Find a group of at least 3 enemies that are near each other. Activate Aether and stealthily kill an enemy. If you’re spotted after a kill, the counter will reset. Kill 2 more nearby enemies with Aether activated to finish this off. Use the machete to stay silent.
 Dressing Down
As Julianna, disguise yourself as Colt using Masquerade.
Online
In order to earn this, you’re going to have to select “Protect the Loop” from the main start menu.
Julianna has a Slab called “Disguise.” This ability will allow you to disguise yourself as any character while invading another player’s game. Get in close to Colt and use Disguise to change your appearance from Julianna to Colt.
If you’re having trouble with this, it can be boosted with a friend. The player playing as Colt must have their online settings set to “Friends Only.” The player playing as Julianna must then select “Invade Friend’s Timeline” and then select the PSN ID of who you are boosting with.
 For Every Occasion
Take 36 different Trinkets into the field with you while playing as Colt.
Trinkets are small upgrades for your character and weapons that you can take with you on missions. These are found by killing enemies. Each time you find a Trinket that you don’t have, infuse it. You can always sacrifice the ones you don’t want or need after getting this.
You’re going to need to take 36 different Trinkets with you on missions. As long as you’re switching out Trinkets before each mission regularly, this will come pretty quickly. Make sure to avoid to using the same Trinkets until this pops.
 Spoiled for Choice
Infuse one of each type of weapon.
There are 12 different weapons that you will need to infuse in order to earn this. The colored tier of the weapons does not matter.
- Tribunal
- The Fourpounder
- Limp-10
- Rapier
- Vopat Trencher
- Strelak 50-50
- PT-6 Spiker
- MG-1 Pepper Mill
Special Weapons
- Sepulchra Bretiera – Complete “Keep on Giving” Arsenal Lead
- Constancy Automatic – Complete “All Night Long” Arsenal Lead
- Strelak Verso – Complete “In This Together” Arsenal Lead
- The Heritage Gun – Complete “Super Shifty” Arsenal Lead
 The Spice Of Life
Die every which way as Colt: Drown. Fall. Choke on poison gas. Succumb to fatal depressurization. Get blown up. Shot. Stabbed. Ground up. Fried by a rocket. Oh, and obliterated by a reactor. Fun, right?
This is something that you may earn without trying over your many different loops. You’re just going to have to die in many different ways. Below is a list of how you can die to meet the requirements.
It’s important to note that the deaths below don’t have to end your loop. They will still count when using Reprise.
- Drown – Just jump or fall into water.
- Fall – Get up onto a high rooftop and fall to the ground.
- Choke on Poison – Jump into the gas pit or get spotted by Harriet in Karl’s Bay. When spotted, Harriet will flood the hangar with poison gas.
- Depressurization – This can be done in The Complex in the afternoon. Allow yourself to be spotted in the multilevel circular area of Wenjie’s Lab. The room will then depressurize.
- Blown Up – Step on a mine and die or get killed by a grenade.
- Shot – Get shot and killed.
- Stabbed – Get killed by an enemy wielding a machete.
- Ground Up – This can be done in Updaam in the evening. Fall into the same meat grinder you used to kill Aleksis when going for the “Alpha Burger” Trophy.
- Fried by a Rocket – This can be earned in Updaam at noon in the area where you go after Charlie. For this, you’re going to need to stay undetected until after you hear a key conversation. There will be 2 eternalists on the ground floor that you need to silently kill. Aether will help with this. After they’re dead, go up one flight of stairs and follow the path until you hear the 2 eternalists having a conversation about their rocket. Listen to the entire conversation and you will then be given a new 2-Bit command. This command will allow you to launch the rocket. 2-Bit is a robot on the 2nd floor of Charlie’s area locked behind two doors that you can hack.
Before you can get the rocket to launch, you will need to insert charged batteries into the rocket command console in the cockpit. The cockpit is accessible from the same floor that 2-Bit is on. It acts as a bridge in the middle of the room. You should see green and red lights lit up inside. There are plenty of batteries throughout this area for you to find. They are used in the animatronics that are powering the moveable displays of the game. They’ll be plugged in on the ground. After you’ve inserted the batteries, head to 2-Bit and launch the rocket. Get to the top floor quickly and let the rocket’s ignition kill you.
- Obliterated – This can be done in Fristad Rock at noon in the same area where Fia is located. This one is easy. Get into Fia’s area and get spotted so that Fia is alerted. She will then meltdown the reactor which will kill you.
 Bling Bling Bang Bang
Equip a loadout worth more than 45100 Residuum.
This is something that you won’t be able to earn until later in the game when you’ve infused purple and higher gear. You can easily knock this out by having every inventory slot filled with high tier weapons equipped with high tier trinkets, high tier character trinkets and Slabs with both upgrade slots filled. You’re going to need to infuse a lot of gear to set this up, but this is something that you’ll probably get without trying for it. It’ll likely pop naturally as you play.
This will pop in the inventory screen when you hit the required number.
 Full Deck
Kill a Visionary using a full loadout, without any empty slots or sockets, and escape the map.
This is another one that won’t come until later in the game. You will need to equip a piece of gear in every possible slot. Depending on what gear you use, you’ll probably unlock “Bling Bling Bang Bang” here as well.
Here is what will need to be equipped:
- 3 Weapons
- 9 Weapon Trinkets – 3 Per weapon
- 4 Character Trinkets
- 2 Slabs
- 4 Slab upgrades – 2 Per Slab
After you have something equipped in each of the inventory slots, load up any location, kill any Visionary and then escape. This will pop upon your escape.
 Know Your Enemy
Complete one AEON dossier.
The description for this is a little confusing.
In the Touchpad menu, you can find a sub tab under Documents called AEON Profiles. These are files on each of the 8 Visionaries plus Julianna. There is 1 document per character and you will need to find them all in order to pop this.
These documents are called “The Sixty Second Minute.” These are in areas where the story will take you. Just be sure to thoroughly search the areas you go to for documents. As long as you’re paying attention to reading documents as you follow the story, this is something that you should end up getting without going out of your way.
 The G.O.D. of O.S.P.
Enter a map with an empty loadout and kill all Visionaries present. Leave the map. Wash your hands.
For this, we’re actually going to be combing a few other Trophies into 1 quick playthrough to knock them all out at the same time. Below are the Trophies that you can pair with this.
“Mightier Than The Gun“
“Silent Disco“
“Only the Guilty“
This is easiest done on in Fristad Rock in the afternoon after you’ve completed the “Afternoon Delight” Visionary lead. You’re going to need to have both Charlie and Fia at their secret meeting spot in the 09 Bunker.
If at any point you get spotted, quit to the main menu via the pass screen and try again. If the icon above an NPC’s head is red, this means you’ve been spotted.
Before starting, empty out your inventory completely. The only things you’ll be able to take is the Hackamajig, grenades, machete and Reprise. Unequip everything else.
From the start, you need to head to the right toward the colored light display near the red smoke and head toward the shipping containers.


Get on top of the containers and stay to the right against the mountain. Stay crouched and head toward the shore.

Stay on the shoreline to avoid enemies and head straight for the bunker.


Once inside the bunker, head down the elevator shaft all the way to the bottom and enter the room where Charlie and Fia are. Stay hidden and work your way up to the top floor via the left side of the room. When you get to the top, pull the lever and then immediately hide. The lever will flood the room and the two will come looking for you. Just stay hidden and let the water kill you. It’ll take a it for the water to reach you.

You’ll respawn and then you can follow the trail you took here back and exit the mission. Remember to stay hidden on your way back.
If you can pull this off without being seen, using a gun and without killing anyone else but the two targets, you will unlock all of the Trophies listed above.
 Mightier Than The Gun
Kill all Visionaries in a map – and make it to the exit – without using a gun.
See “The G.O.D. of O.S.P” for more details.
 Silent Disco
Get in and out of a map without being spotted – and kill all Visionaries present.
See “The G.O.D. of O.S.P” for more details.
 Only The Guilty
Kill all Visionaries present in a map and escape without killing any Eternalists.
See “The G.O.D. of O.S.P” for more details.
 Clean Sweep
Kill everyone in a time period and escape.
For this, you will need to kill every single enemy in one time period. This does not need to be done across the whole day. Unfortunately, there is no tracker or counter for how many enemies there are. You’re going to have to go through and check every single area for enemies. Once you’ve thoroughly checked and cleared the map, finish your objective and exit the area.
 You Only Die Once
Finish an entire loop while wearing a ClassPass.
This is actually a lot easier than it may sound. A ClassPass will disable all of your abilities when equipped.
First, go to Fristad Rock in the morning, find the ClassPass and equip it. Then, head back to the exit and leave. The ClassPass will stay equipped when you leave.
Now, enter and then immediately exit any of the locations for the remaining time periods of the day with the ClassPass equipped. You don’t have to kill any Visionaries. Just enter and exit with it equipped for each time period. You can literally just turn around and exit seconds after entering the location. This will pop when you exit your location of choice in the evening.
Skipping time in the loadout screen will not count for this.
 Play It Again, Colt
After finishing the game once, kill all Visionaries in a map and escape.
All you have to do here is kill any Visionary target after you’ve beaten the story.
 Clean-ish Hands
Kill all Visionaries – and no Eternalists – in a single loop.
You will need to complete the story before you can go for this.
You’re going to need to kill all 8 Visionaries in the same day. This is the same thing you did when you beat the story except you can only kill the 8 targets. You cannot kill anyone else. It’s okay if an eternalist dies from something caused by the environment. You just can’t be the one to kill them.
It’s important to note that enemies can be alerted. Getting seen will not void this Trophy. You just can’t kill any eternalists.
I would recommend taking things stealthily. Become very familiar with the maps, enemy placement and the behaviors of the 8 targets.
Shift is a good Slab to use as it can help you get across map quickly. It can also help reach ledges if you’re going above enemies instead of around them. That can help open up different paths to take if their are too many enemies around.
If you don’t want to go slow, that’s fine too. You can try to run straight for the visionaries, kill them and then run for the exit. Remember, it’s okay to be spotted by eternalists, you just can’t kill them.
If you accidentally kill an eternalist, pause the game and back out to the main menu. You’ll be able to keep your progress and start back over on whatever map you messed up on to try again.
If you die completely, this will reset your loop. If this happens, quickly exit the game completely and boot it back up.
- Karl’s Bay – Morning: Make your way over to Hangar 2 where Harriet is found. Go into the the shipping container outside of the hanger by the docks and enter the code to open the door. Sabotage Frank’s fireworks by choosing to jam the rainflaps. After you’ve done that, go into Hangar 2 and kill Harriet. After both of those are done, you can exit the area and finish part one.
- The Complex – Noon: Head to Egor’s camp where the invisible computer console is. Once there, grab a nullifier from one of the trailer like buildings and turn it on near the console to reveal it. Enter your code and press the button to sabotage his experiment. This area is surrounded by eternalists, so be careful when inputting your code. Once that is done, exit the area to complete this step.
- Fristad Rock – Afternoon: This will be the exact same step as “The G.O.D. of O.S.P” Trophy. Go straight to the bunker where Fia and Charlie are meeting in secret. Get inside and kill them both. You can then exit Fristad Rock.
- Updaam – Evening: If you sabotaged Egor’s experiment in the Complex, then all three targets will be at the party. Go straight to the party and kill Aleksis by dropping him into the meat grinder. After that, get onto the roof of the building where you killed Aleksis and you should find both Wenjie and Egor up here. Kill them both, but don’t go for the exit. Instead, you’re going to need to go to the RAK, get in and take off.
When you crash and get out, head into the building to confront Julianna. You have to kill Julianna here. You can either shoot her immediately after your slabs are stripped or you can kill her during the duel. Once she is dead, jump off of her platform to end the loop and pop this Trophy.
 A Charlie Montague Game
Prove you’re a real gamer by winning Charlie’s Wake Up Challenge, Reward Scheme, the Moxie, Haul-A-Quinn, and the Yerhva.
There are 5 different “games” that need to be completed that are found across the different locations.
- Wake Up Challenge – This is completed in The Complex in the morning. There are 4 boxes in the location that you will need to open within a set timer of 3 minutes. This timer will start as soon as you enter the location, so you’ll need to be quick. For this, I found it best to loop around starting from the right side of the map and ending on the left side.
You may want to do a practice run to get a better idea of their locations before making a run at them.
-
- Box 1 – Sticking out of the edge of the map to the right on a narrow platform.

-
- Box 2 – Stay along the edge of the map and head toward Wenjie’s Lab to find this one on the ice.

-
- Box 3 – Head around to the other side of the map crossing via the ice that will lead to the second entrance from the tunnels. This box is found on a small chunk of ice tucked away in a corner right next to a turret.


-
- Box 4 – Turn around from 3 and head into the bunker through the big open doors. Go up to the 2nd floor where you’ll find a locked control room. You can hack the doors open by aiming the Hackamajig through the window of the door. This box will be on the front desk.


- The Moxie – This is completed in Updaam in the afternoon. Exit the tunnels via the door on the right and you should see a big sign to the left that says “Moxie.”
For this, you’re going to need to complete 3 floors of pressure plates and laser puzzles. Make sure to have Shift equipped to make these very easy to complete. There is a timer going, but that does not matter to the Trophy. If you can finish under the timer, you’ll be rewarded with a weapon. For this Trophy though, all you need to do is finish each floor. It’s okay to go over the timer.

- Yerhva Quiz – This is found on a computer terminal inside of a building just to the left of where you exit the tunnels. The order of the questions will be randomized, but the answers will be the same.
- Question – “The wriggling, writhing energies of the Loop have been harnessed to gift us with abilities beyond our biological potential. What birthed our trinkets and slabs?”
Answer – “Dr. Wenjie Evans personally engineered each one.”
-
- Question – “AEON graces this island as kaleidoscopic jewels upon the neck of the world’s greatest beauty. What seeks the Program?”
Answer – “The advancement of human potentiality and elightenment.”
-
- Question – “Harriet Morse is the gatekeeper, Blackreef the gate. A veil hangs across the threshold. What do we discover when it parts?”
Answer – “The Great Beyond”
-
- Question – “The Bay, the Rock, and labyrinthine Updaam wear AEON colors proudly, but that decor belies their history. From whence came the peculiar names that grace them?”
Answer – “They date back to a lost fishing colony.”
-
- Question – Before AEON’s arrival, Blackreef slept in frozen utero, awaiting new purpose. Who then made landfall, reawakening her from slumber?”
Answer – “Colt Vahn and Egor Serling, on a voyage of discovery.”
-
- Question – “Sink your toes into the dark earth and let the vibrations of her voice course through your bones. From whence did this island derive her name?”
Answer – “Coastal coral formations.”
-
- Question – “Karl’s Bay has worn many faces, most as lost to time as the mysterious Karl himself. What was its most recent incarnation prior to AEON’s arrival?”
Answer – “A military air base.”
-
- Question – “From what seed did AEON spring?”
Answer – “The shared ambitions of Harriet Morse, Egor Serling, and Dr. Wenjie Evans.”
-
- Question – “Blackreef boasts a bountiful feast for the senses. Which transcendent work towers above the island’s myriad other artistic pursuits?”
Answer – “The nose, chin, and eyes of Charlie Montague.”
-
- Question – Decades ago, warmongers toyed with the temporal tides eddying about Blackreef. Their sigil-marked temples stand still. What named their doomed enterprise?”
Answer – “Operation Horizon”
- Haul-A-Quinn – Before you can start this one, you will need to go to the reactor where Fia is located. This is in Fristad Rock at noon. There is a room off to the side before entering the reactor room that will have a code written on a white board. You need this code. You’re going to need to write down in real life as this code won’t be saved in any of the in game documents. These codes are different for every player.
After you have the code, you’re going to need to do certain tasks in Karl’s Bay over the course of multiple time periods.
After exiting the tunnel to Karl’s Bay, you should notice a mannequin across from where you took the Yerhva quiz. This is what we will be interacting with for this “game.”

Karl’s Bay – Morning
-
- Get a charged battery and insert it into the Haul-A-Quinn. If you can’t find one, you can take one out of a turret.
After that, go to the delivery machine up the road from the Haul-A-Quinn and enter the code from the previously mentioned from the white board. Put in a request for a Crank-Wheel.

Next, you’re going to need to save the eternalist that is being lowered into the gas pit in the hangar by Harriet. You need to quickly kill Harriet before this eternalist dies. If he is being lowered, you can interact with the up button on the left side of the cockpit to raise him back up. We need him alive so that his room is unlocked for us later in the afternoon.
Karl’s Bay – Afternoon
-
- Now go to the delivery machine and retrieve your crank-wheel order. After you grab it, request a nullifier be sent to Karl’s Bay. Take the crank-wheen back to the Haul-A-Quinn and give it to it.
After that, go to the Big Smiley building. Its the multicolored building with all the big heads outside of it. Go through the door on the ground floor. This door will be locked if you did not save the eternalist that was being lowered into the poison gas pit in the previous step. Pick up the brown mannequin head and give it to the Haul-A-Quinn.


Karl’s Bay – Evening
-
- Go to the delivery machine and retrieve the nullifier. Take it back to the Haul-A-Quinn and you’re now done with this totally fun “game.”
- Reward Scheme – There will be crates that spawn in Karl’s Bay in the evening that you will need to find. These look just like the ones from the Wake Up challenge. Unlike the previous box challenge, these will not be timed. There will be puzzles that you need to complete after opening a box.
When you have opened every box, return to Fathoms of Lament to find the door inside now open. You will have one more challenge to complete here. You will need to hit switches in a certain order in under 45 seconds. This will work the exact same way as the box located in Hangar 2 (listed below). There will laser sensors in here that block your path, but you can actually use Shift to safely go through them. If you fail, don’t worry. You can immediately try again and the switches will keep the same order.
You can actually find a map of what boxes have spawned and where they are by going in to the Fathoms of Lament building. They will be in different locations for each player. All you have to do is open them. Some are pretty straight forward and others are tied to a puzzle.

Your map is probably going to look different, but even though they will be in different locations, but most of them are pretty straight forward. They’ll either be on the road or guarded by enemies and turrets. There are 2 that are tied to timed puzzles, so I’ll list those below. If a light is blue, that means it is opened.

-
- Dawn of Reason – Make sure to do this one first. It is a timed challenge and you’ll need to restart your loop if you fail. So knock this out first and then go for the others.
You will have 3 minutes to figure a code for the locked door. There are pictures of hints spread through out the room on the walls and you will need to line up the images to figure out the full code. I know that may sound confusing, but it’s pretty easy and 3 minutes is more than enough time to get figure it out. Your codes will probably be different, but I’ll list mine below to help with a visual of what you need to do here. Once you have all 4 numbers in the correct order, input them to open the door and finish this puzzle.


-
- Hangar 2 – In the hangar, you’re going to need to flip 6 switches within 30 seconds in a certain order. You’ll know what switch to flip next as it will have a flashing red light. You gain a little bit of time by flipping the correct switch. Make sure you have Shift equipped so you can move around the hangar as quickly as possible. If you fail, don’t worry. You can immediately try again and the switches will keep the same order.
 Cooking With Gas
While playing as Colt, ignite a gas cloud while someone is inside it.
I was able to earn this by first killing Harriet, picking up and infusing The Fourpounder handgun that she was carrying. The rounds from this weapon will release gas when fired. Shoot an enemy with Harriet’s Fourpounder to envelope them in gas. Then quickly switch to your next weapon and shoot the gas cloud to set the enemy on fire.
 Sugar Crash
While playing as Colt, use candy to gain a tactical advantage.
There are candy machines spread through out the different areas. For this, you need to get an enemy to slip and fall as a result of stepping on candy.
Go up to a candy machine and press R3 to kick it and the machine will break spilling a lot of candy out onto the ground. Once you’ve done that, either lure an enemy over to the area or get spotted and run away. They’ll chase you and will slip on the candy if they run through the pile.
This is best done in Updaam in the morning. There is a candy store right near your tunnel exit that has many candy machines in and outside of it along with a few enemies nearby.

 Residual Earnings
Absorb more than 20000 Residuum in a map.
You’ll be given the ability to absorb Residuum as part of the story. This is something that won’t be available to you right away.
Once you have the ability, you’ll be able to interact with rainbow shining objects in the environment by absorbing the Residuum from them. Interact with all of the shining objects you can find in a time period including the body of Julianna and or your marked targets. The bodies offer the most Residuum.
 Chop Chop
Kill 3 enemies with the machete in 10 seconds.
This is something you’ll likely earn without going too far out of your way for it. You’ll find many enemies that are grouped up together as you play through the different loops. Equip the machete and attack when 3 enemies are fairly close together. The machete does a lot of damage quickly, so this should be knocked out fairly easily.
 Old Habits Die Hard
Enter 0451 at a keypad.
All you have to do for this is enter “0451” at any keypad in the game. This can actually be earned at the very beginning of the game when you Colt finds out his name. There will be a red circular keypad that you can interact with next to a red door.
 Deathday Suit
Kill the (mostly) naked character in each map.
There are 14 mostly naked characters that you will need to find and kill. There is 1 per map for each time period. There are 4 maps and 4 time periods with 2 locations that are not playable.
- The Complex
- Morning
- Noon
- Afternoon
- Evening
- Updaam
- Morning
- Noon
- Afternoon
- Evening
- Karl’s Bay
- Morning
- Afternoon
- Evening
- Fristad Rock
- Morning
- Noon
- Afternoon.
This is an enemy that like the description says, is mostly naked. You’ll find him only wearing underwear and a helmet with no shirt or pants. He will spawn in every location listed above, but he won’t stay in one place. He will move around. So you’re going to have to thoroughly look around each location in order to find and kill him. Don’t worry, these characters are not missable.

 Oops
Oops
While playing as Colt, cause someone to fall to their death.
This can actually be earned against the very first enemy that you will encounter. He will be standing right next to ledge. Walk up behind him and press in R3 to kick him off the ledge. If you don’t get it here, there will be plenty of other opportunities through out the game.
Thank you for this guide! It is very very helpful.
Glad it helped! Thank you!